Oracle Goldengate
Oracle GoldenGate 23ai Microservices GUI based replication configuration for Oracle 19c Database
prayank waluskar
This guide explains steps to configure unidirectional replication between two Oracle 19c Databases using Oracle GoldenGate 23ai through the web-based GUI (Microservices Interface).
In the below blogs I have explained the steps to install and configure the Oracle Goldengate Microservices 23AI software with ServiceManager & Deployment setup(through GUI based and Silent installation mode).
Oracle GoldenGate 23AI installation and Configuration for Oracle 19C Database on Linux 8(Part 1)
Oracle GoldenGate 23AI installation and Configuration for Oracle 19C Database on Linux 8 (Part 2)
Oracle GoldenGate 23AI Silent installation and Configuration for Oracle 19C Database on Linux 8
Now, in this blog we will see the steps to configure the unidirectional replication between the source and target database.
High level steps
- Database readiness
- User Configuration
- Create DB Connections
- Add Checkpoint and heartbeat Table
- Enable Table-Level Supplemental Logging
- Create Integrated Extract
- Create Distribution Path
- Verify Receiver Service
- Create Replicat
- Validate Synchronization
Step 1: Database readiness
Enable archive log mode
On source database verify that database is in archivelog mode, enable the archivelog mode if disabled.
archive log list;Code language: PHP (php)If disabled:
shutdown immediate;
startup mount;
alter database archivelog;
alter database open;
Enable GoldenGate Replication
On both source and target database set the parameter “ENABLE_GOLDENGATE_REPLICATION” to true
ALTER SYSTEM SET ENABLE_GOLDENGATE_REPLICATION=TRUE SCOPE=BOTH SID='*';Code language: PHP (php)Enable Supplemental Logging
On Source database enable the database level supplemental logging
Run below command to enable:
ALTER DATABASE ADD SUPPLEMENTAL LOG DATA;Verify using below command:
SELECT SUPPLEMENTAL_LOG_DATA_MIN FROM V$DATABASE;Code language: PHP (php)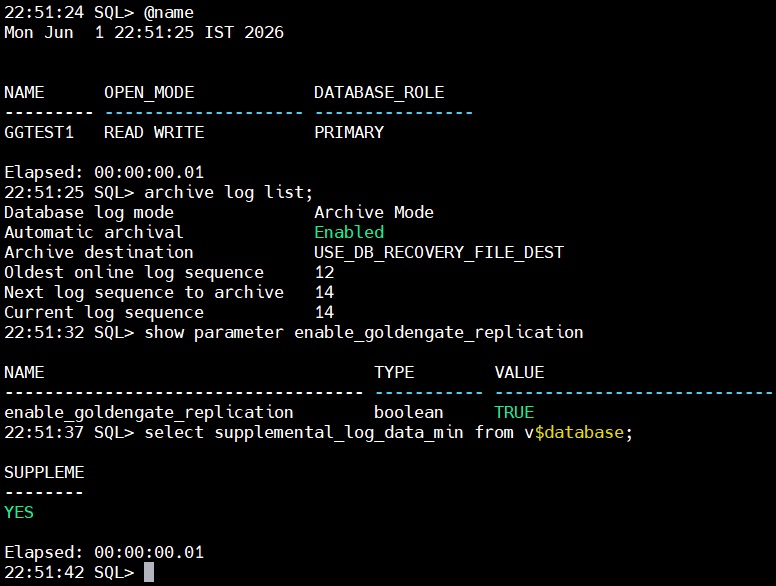
In my machine on both source and target databases all three points are already done.
Step 2: User Configuration
Create User for managing the replication for both source and target database respectively.
On both databases:
CREATE USER GGADMIN IDENTIFIED BY Welcome123;
GRANT CONNECT TO GGADMIN;
GRANT RESOURCE TO GGADMIN;
GRANT CREATE SESSION TO GGADMIN;
GRANT SELECT_CATALOG_ROLE TO GGADMIN;
On Source:
BEGIN
  DBMS_GOLDENGATE_AUTH.GRANT_ADMIN_PRIVILEGE(
    GRANTEE => 'GGADMIN',
    PRIVILEGE_TYPE => 'CAPTURE',
    GRANT_SELECT_PRIVILEGES => TRUE,
    DO_GRANTS => TRUE
  );
END;
/Code language: PHP (php)
On Target:
BEGIN
  DBMS_GOLDENGATE_AUTH.GRANT_ADMIN_PRIVILEGE(
    GRANTEE => 'GGADMIN',
    PRIVILEGE_TYPE => 'APPLY',
    GRANT_SELECT_PRIVILEGES => TRUE,
    DO_GRANTS => TRUE
  );
END;
/Code language: PHP (php)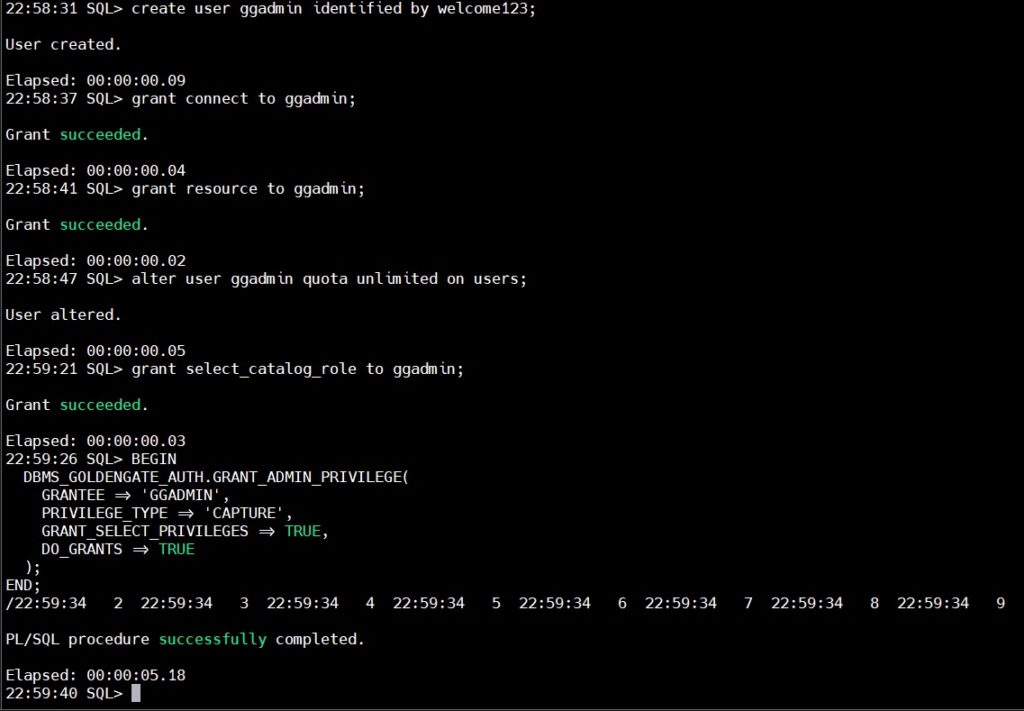
SOURCE DB
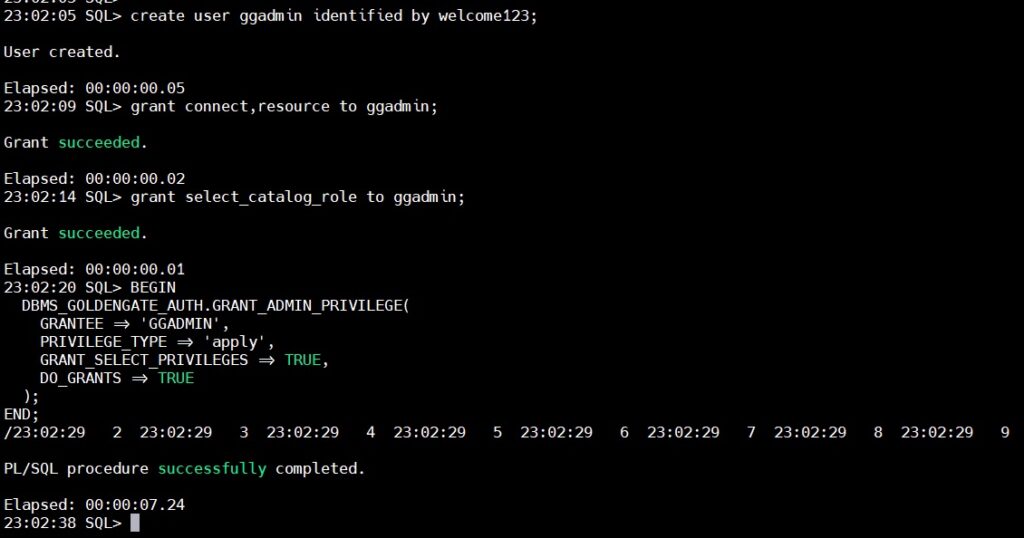
TARGET DB
Step 3: Create DB Connections
Now, let’s login to the GUI interface and create DB connections on both Source and Target DB
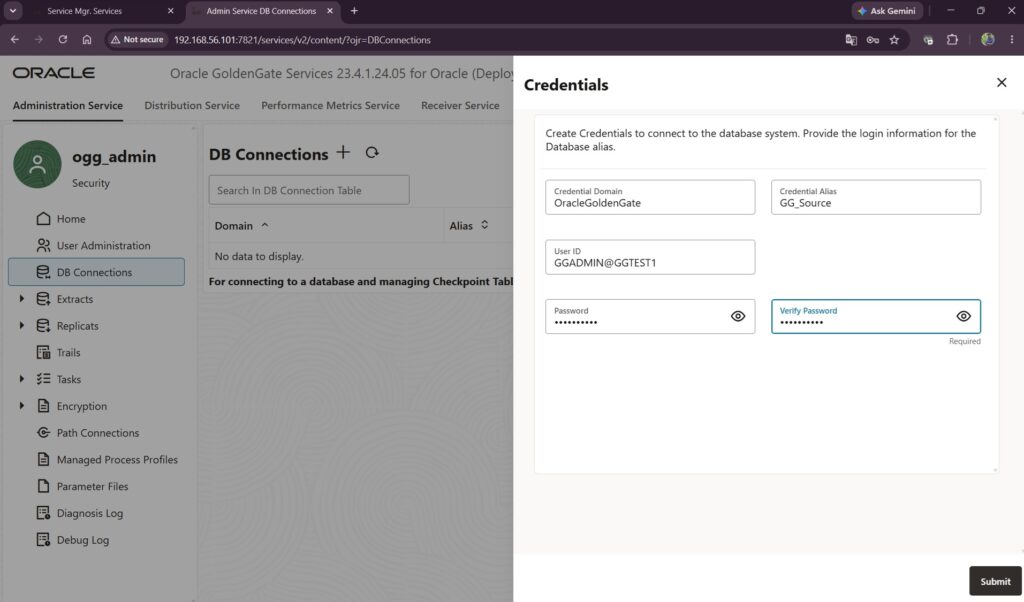
Source DB
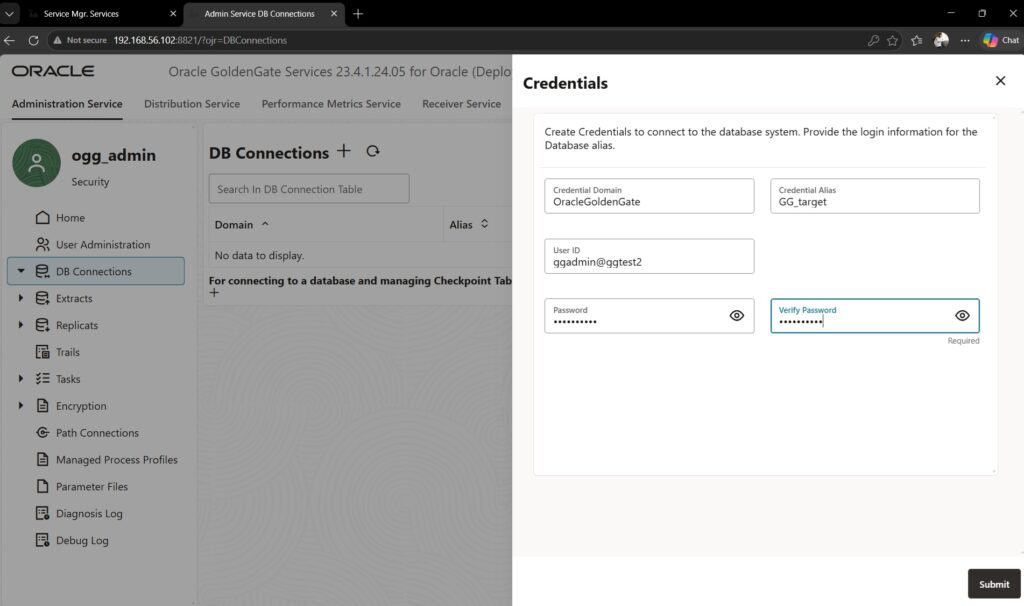
Target DB
To test the DB connection we will click the icon marked in below snap
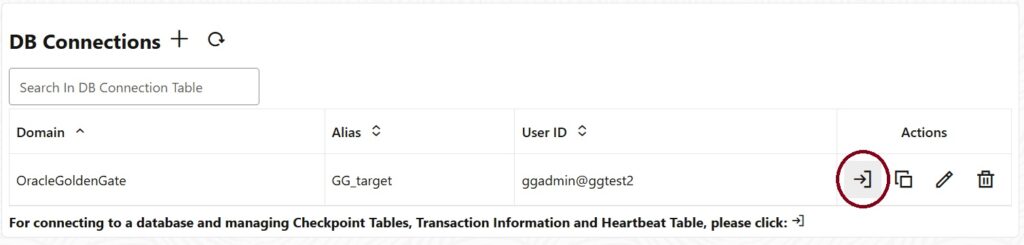
On successful login, we will be able to move to the next step.
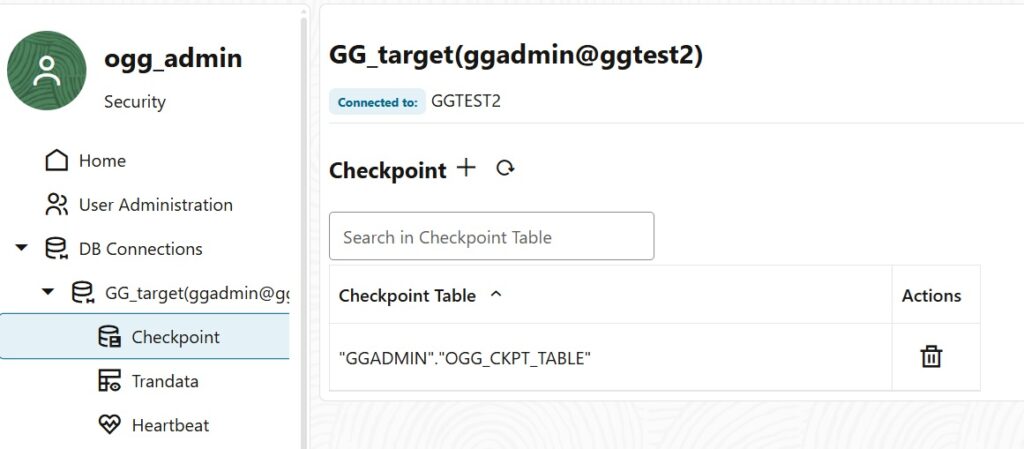
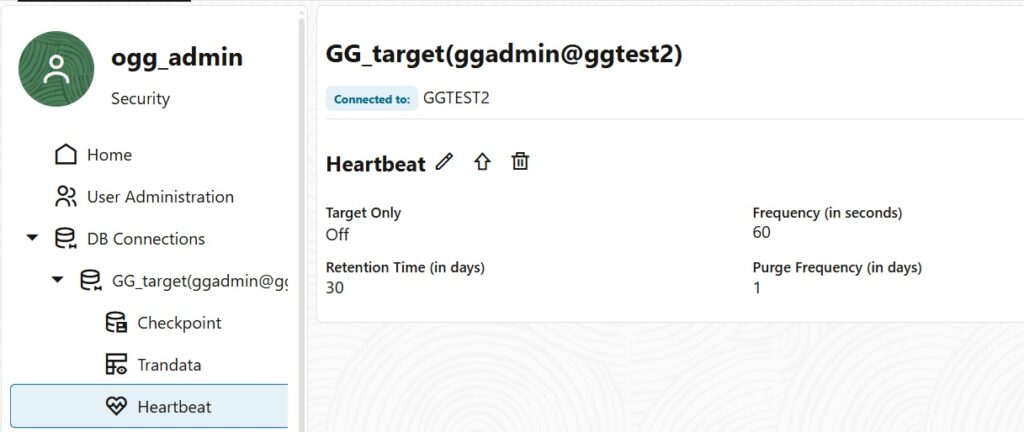
Step 4: Add Checkpoint and heartbeat Table
On target database we need to create the Checkpoint and Heartbeat tables as shown in below snaps
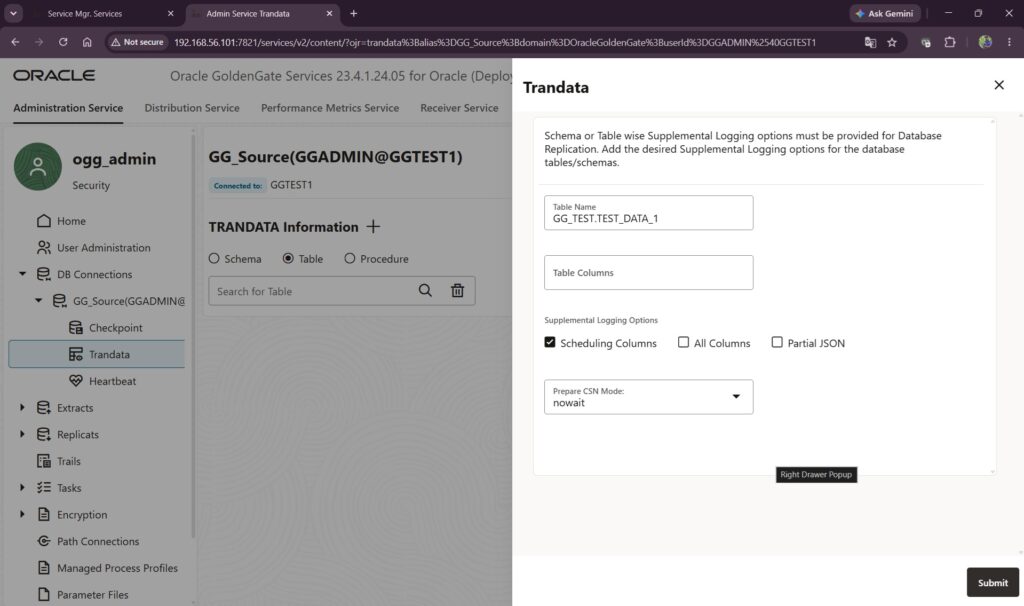
Step 5: Enable Table-Level Supplemental Logging
To enable the table level supplemental logging we will need to enable trandata on source database as shown in below snap
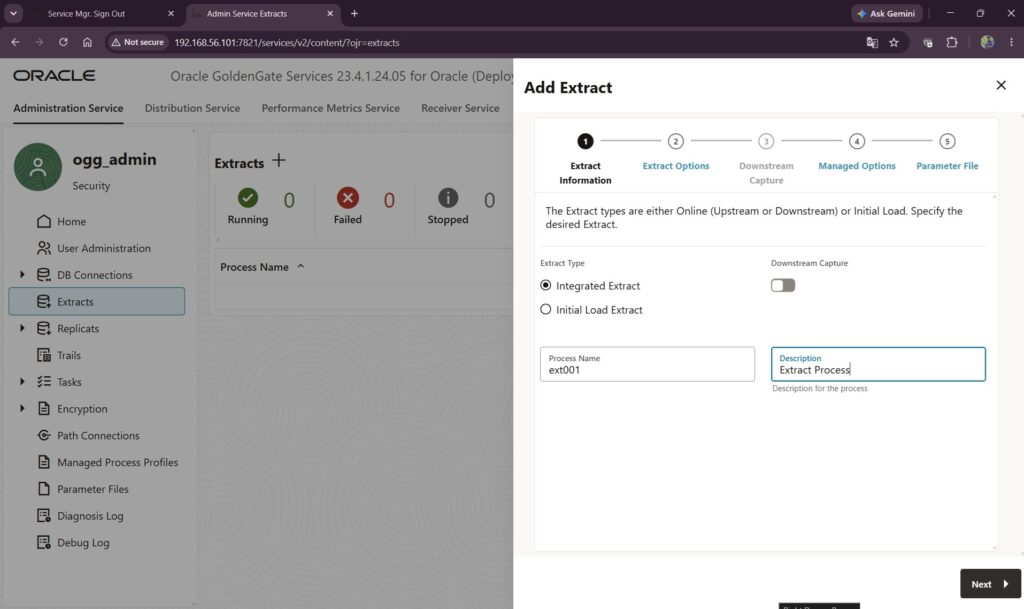
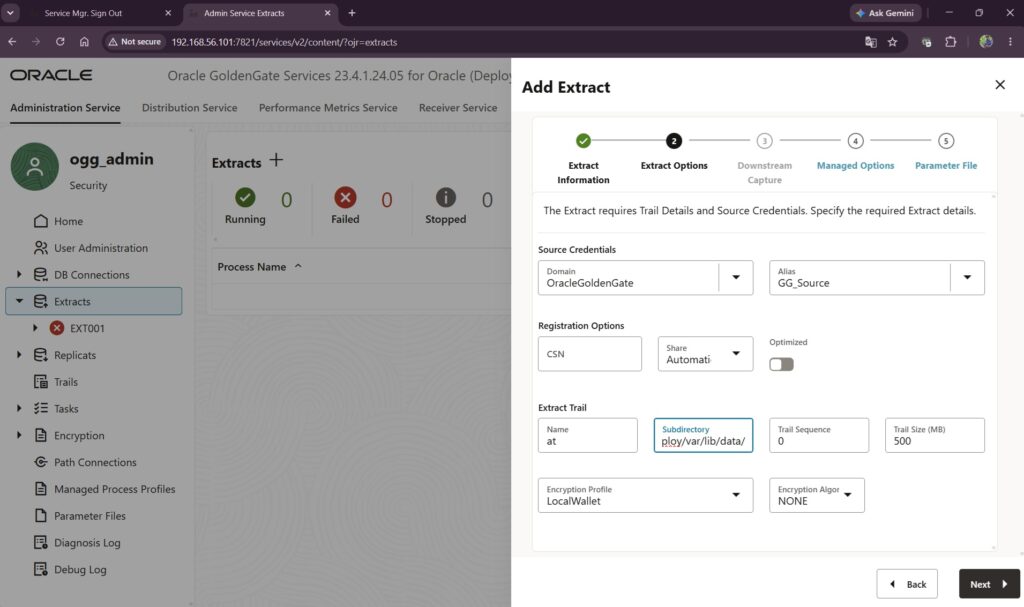
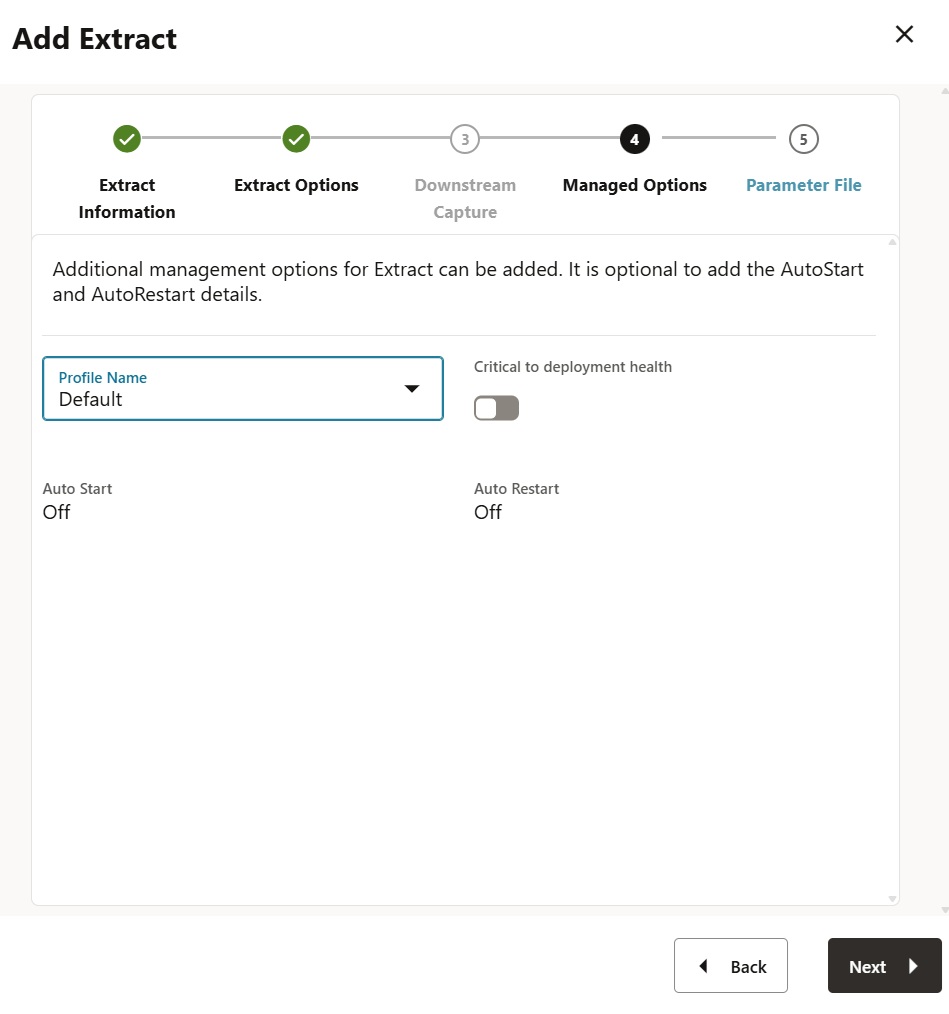
Step 6: Create Integrated Extract
Let’s create the extract process by following the steps shown in below snapshots
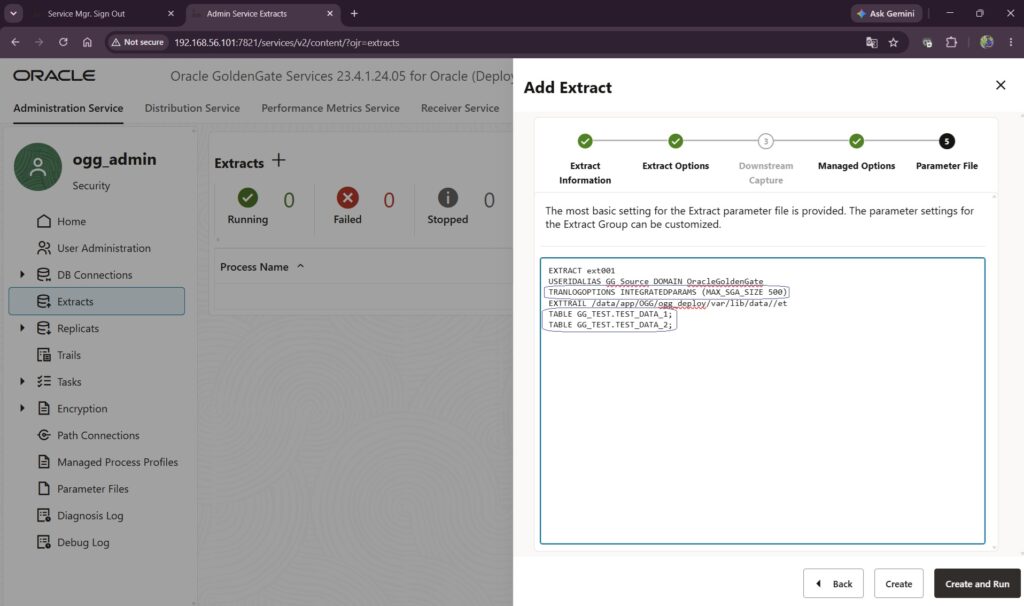
The lines highlighted in above snapshot of parameter files are to be added manually. Rest of the lines will be auto populated from previous steps. Then, click on create and run to start the extract process.
On successful creation, the extract process will look as below
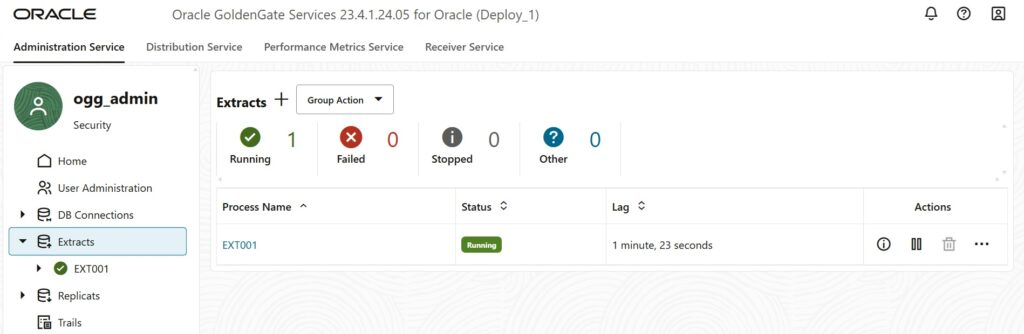
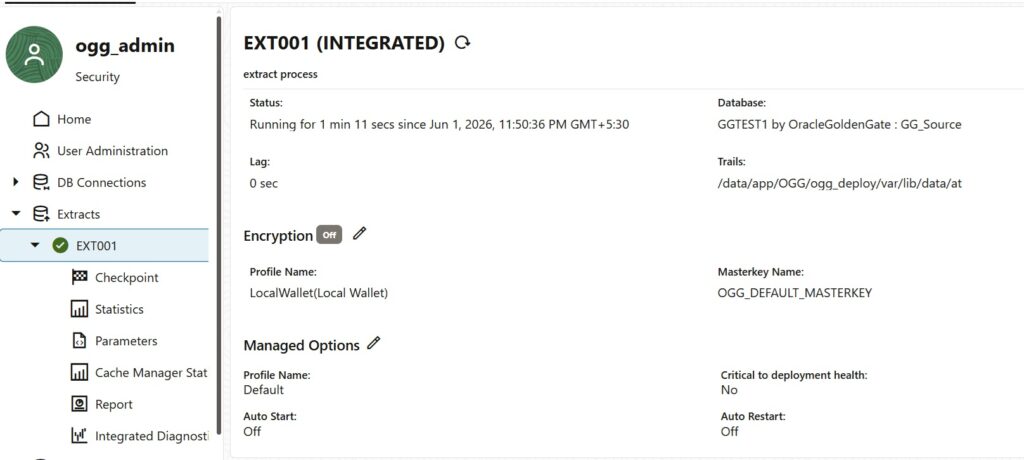
Click on the Process name “EXT001” to view the extract details
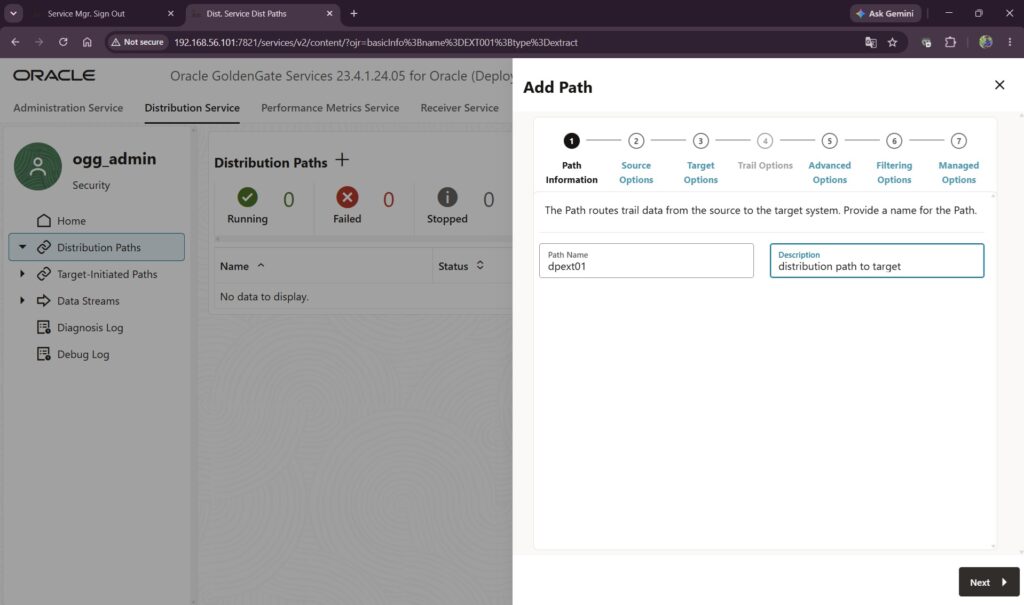
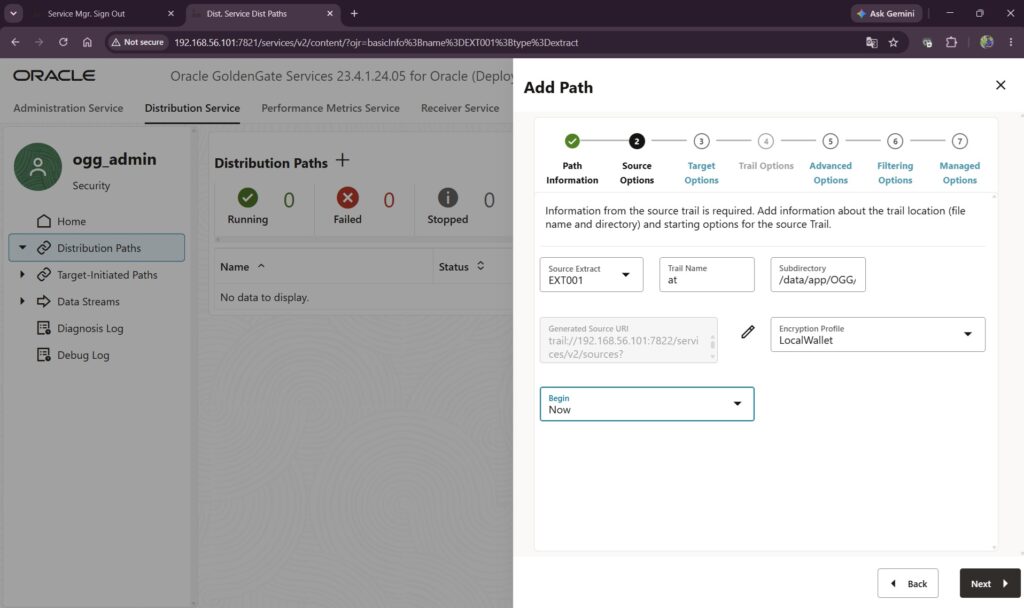
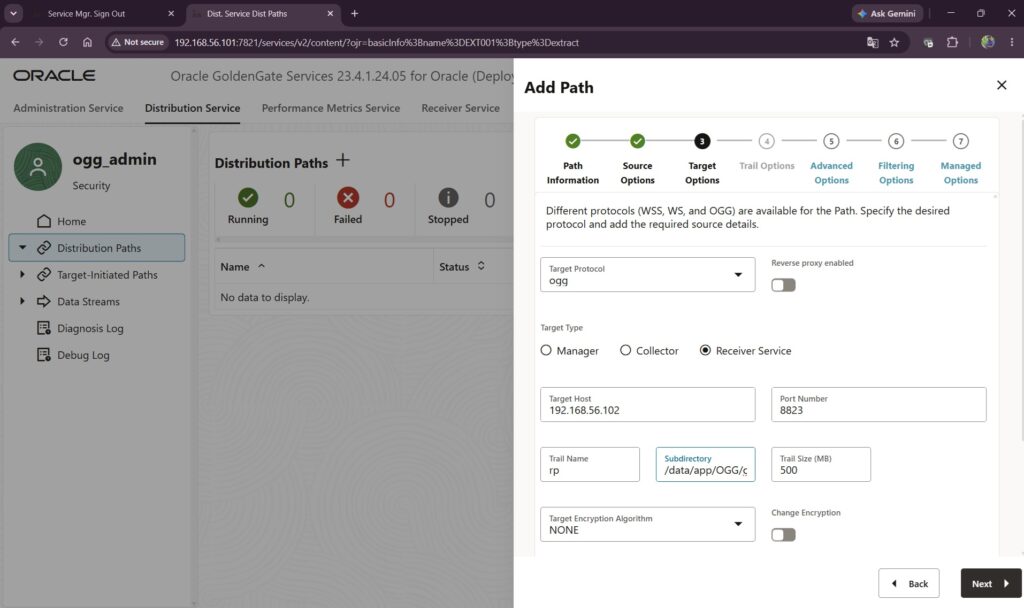
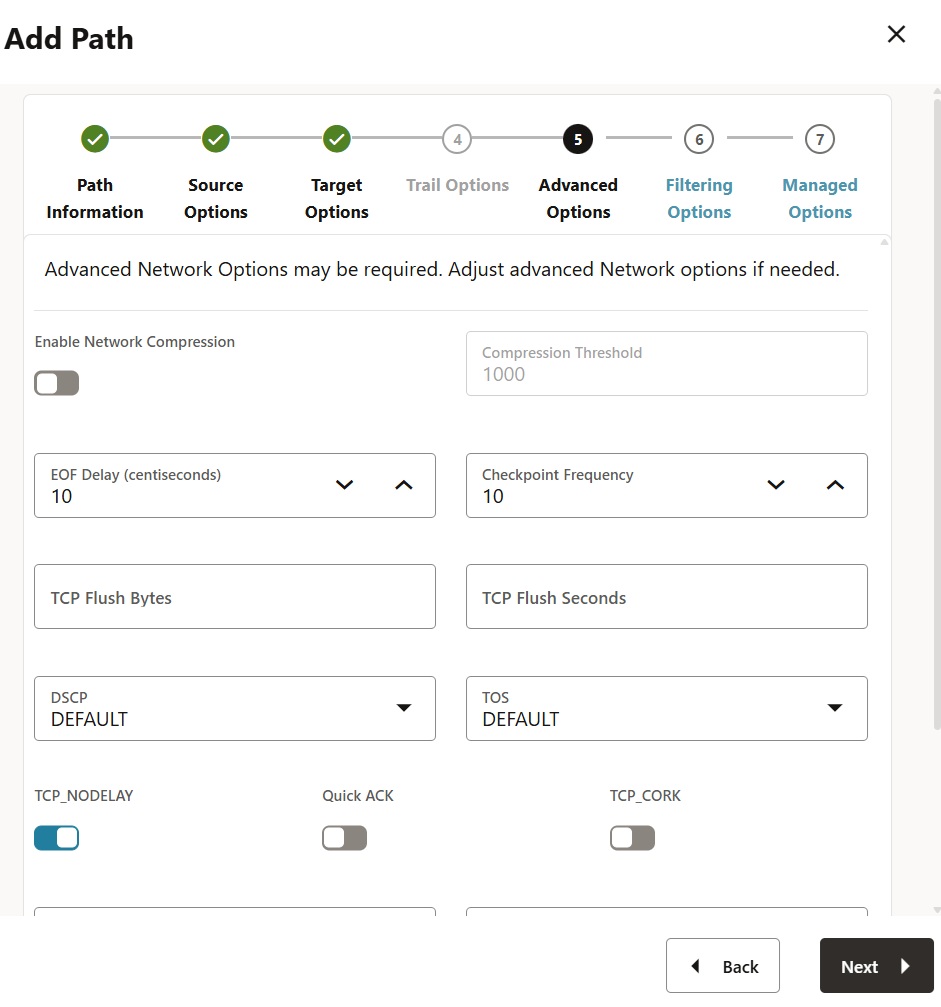
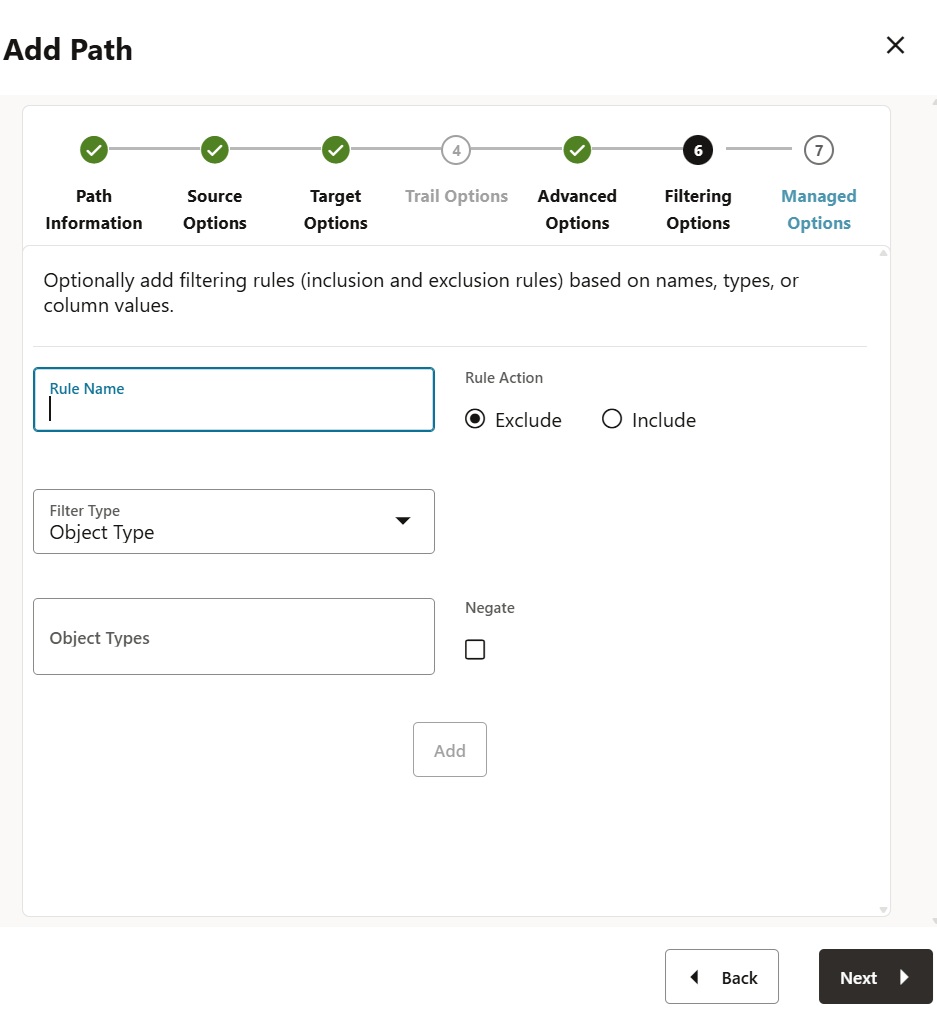
Step 7: Create Distribution Path
Now, we will create the Distribution path to pump the trail files to target environment.
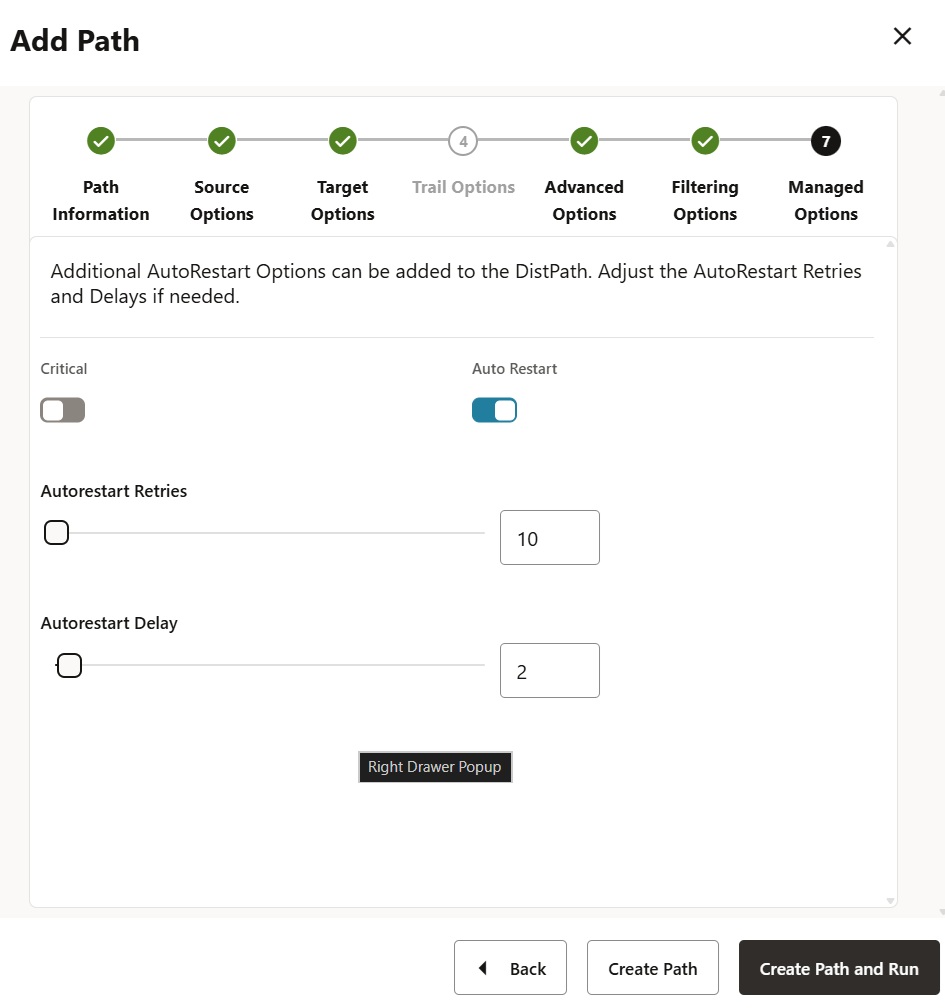
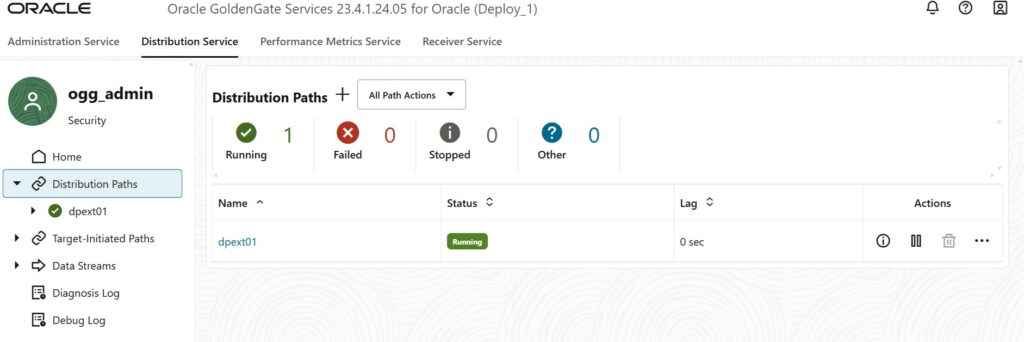
After clicking on “Create Path and Run”, we will be able to see the process getting successfully created as below
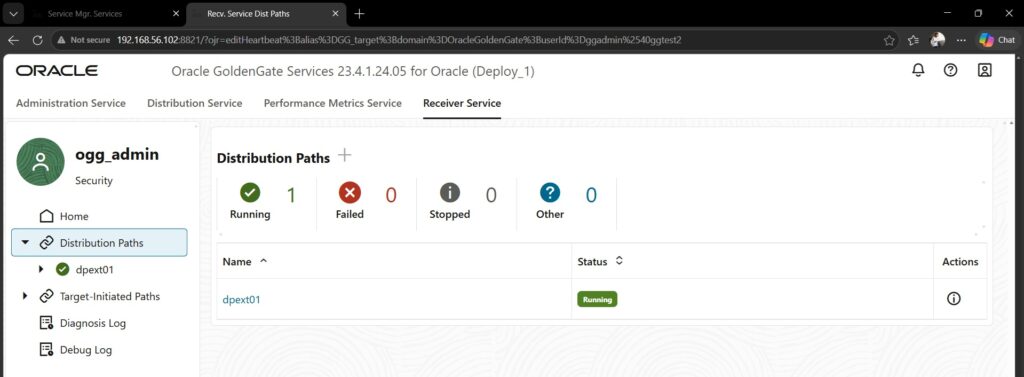
Step 8: Verify Receiver Service(in target environment)
Once the Distribution path is successfully created in source environment we will be able to see a Receiver Service auto populated with same name in target environment as below
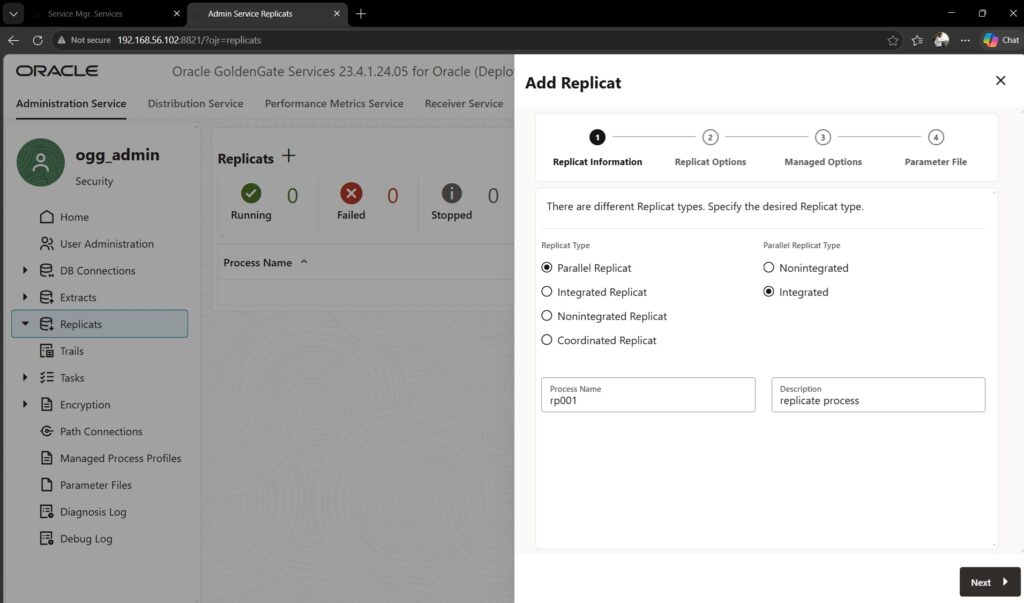
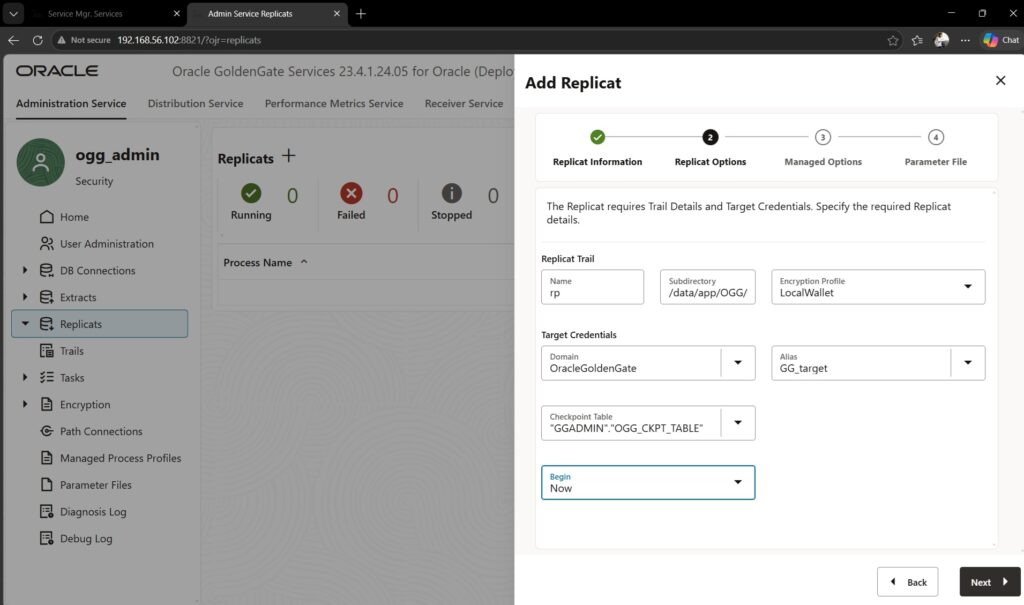
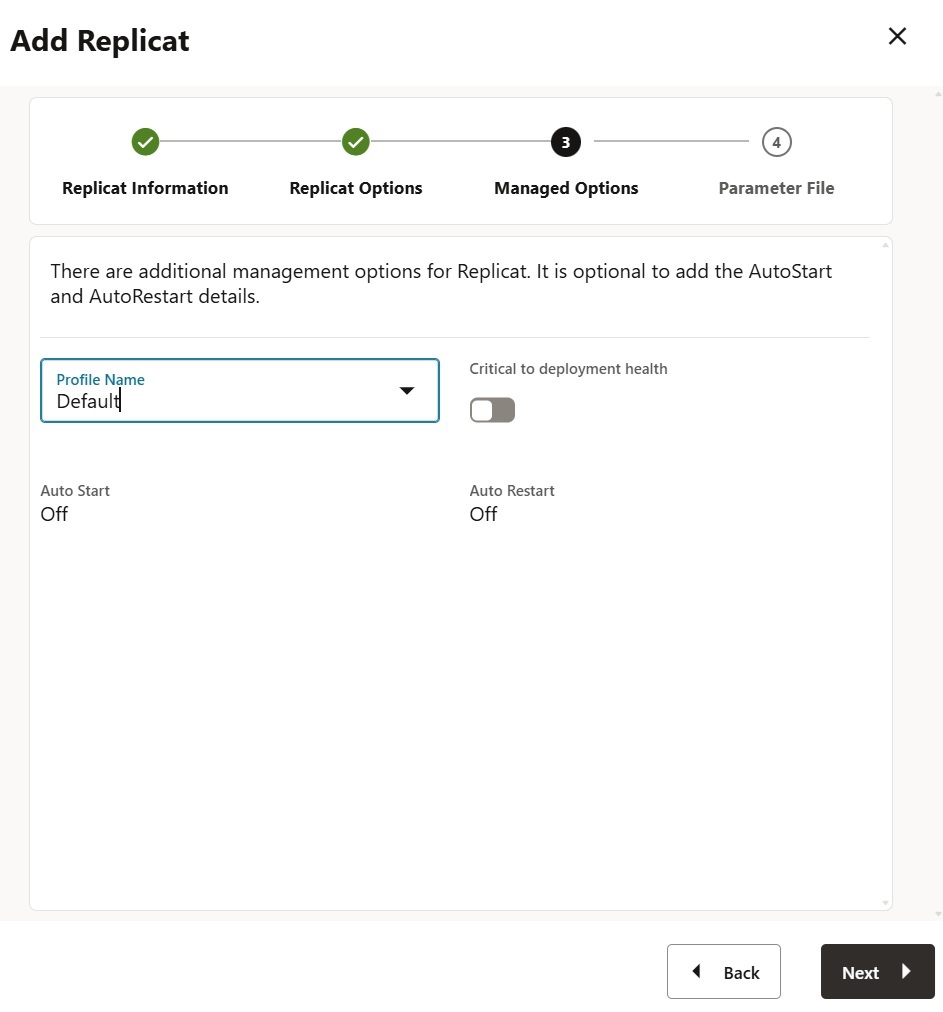
Step 9: Create Replicate Process
As last step of configuration, we will configure the replicat process in target environment
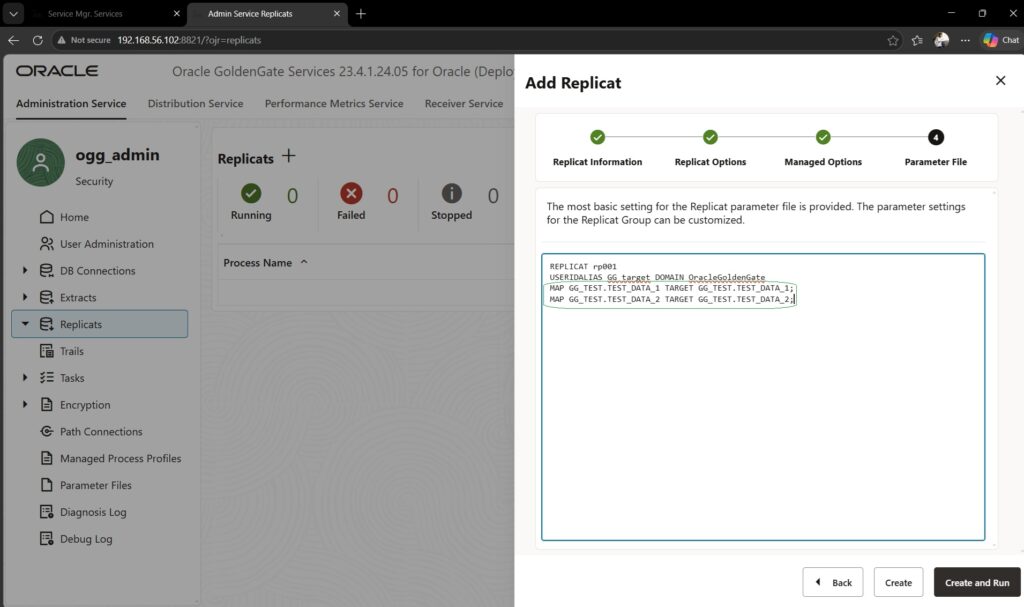
In the parameter file of replicat process we need to manually add the MAP statements for mapping the replication table from source with tables from target DB ( as per highlighted in above snapshot). Then, click on “Create and Run”.
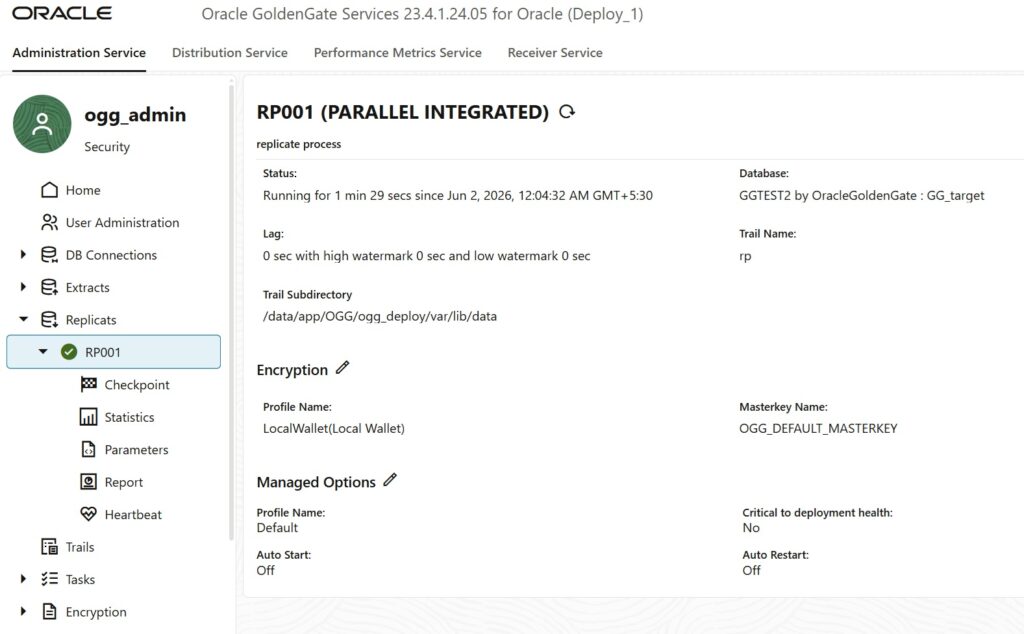
On Successful creation and started, the replicat process will look as below
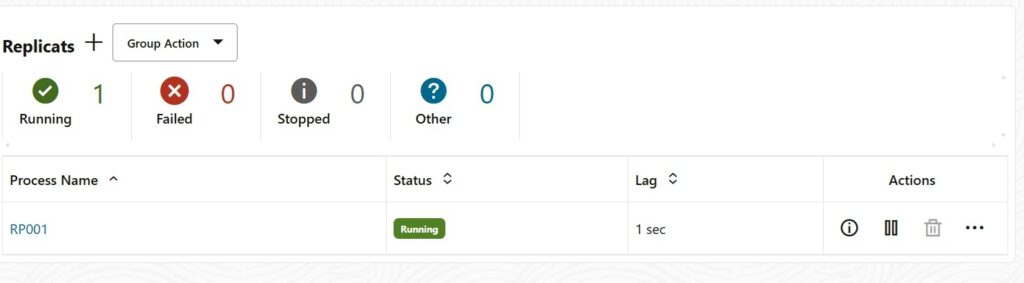
Click on the Process Name “RP001” to view the details.
Step 10: Validate Synchronization
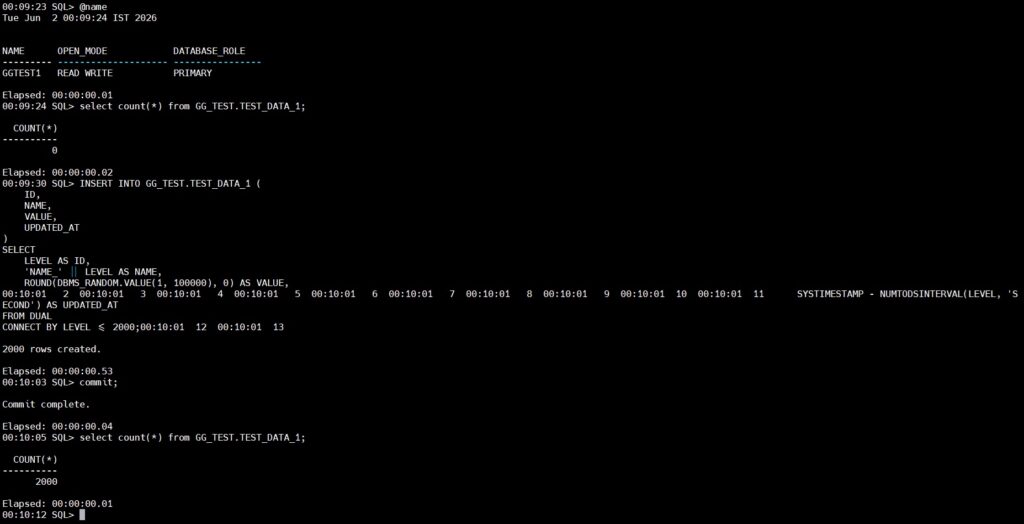
To validate the replication, we will insert few entries in the table part of replication. In our configuration we are using table “GG_TEST.TEST_DATA_1“.
Source DB:
Target DB:
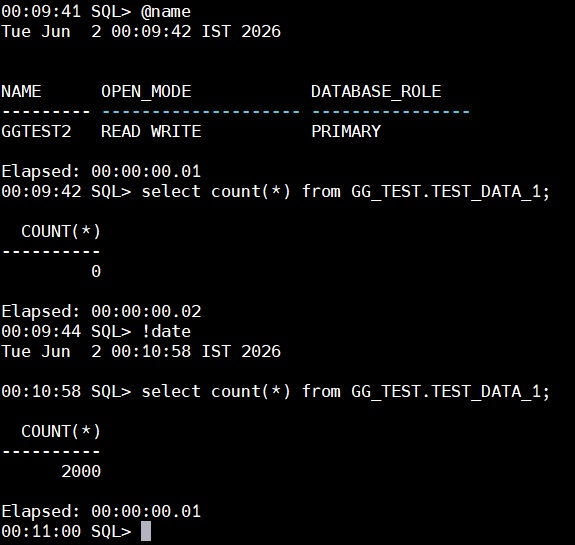
If we observe using timestamps between source and target DB snapshots, we can easily validate that the replication is working fine. Now, let’s check the statistics of each process
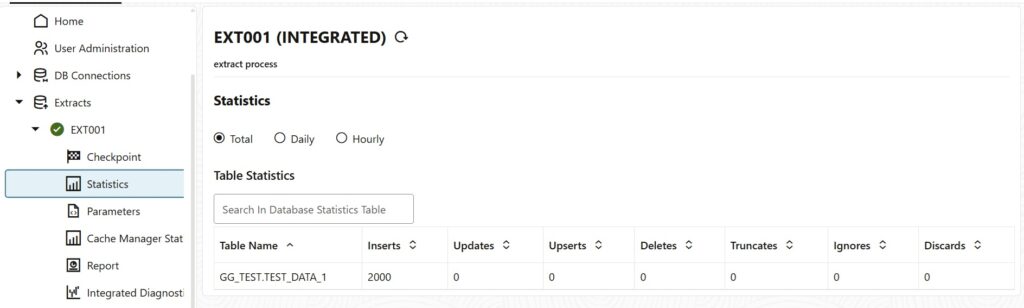
Extract Process:
Distribution Path:
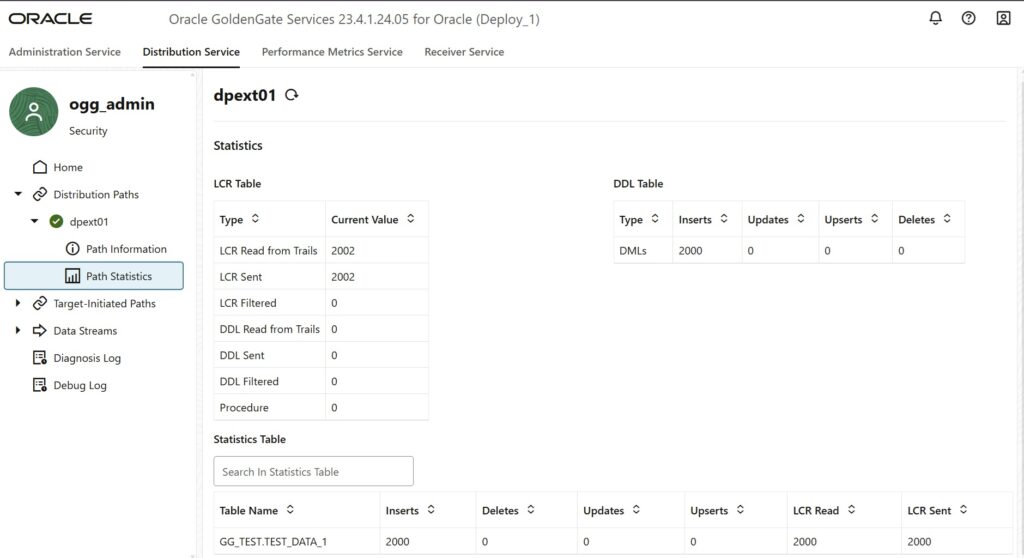
Replicate Process:
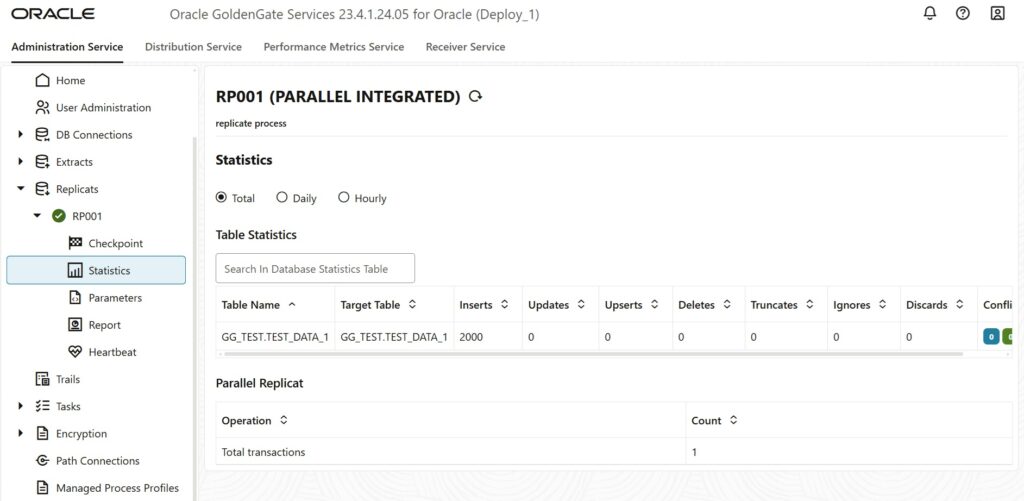
The Replication configuration is done successfully with validation of the replication. Thank you!!!!!