Oracle Goldengate
Oracle GoldenGate 23AI installation and Configuration for Oracle 19C Database on Linux 8 (Part 2)
prayank waluskar
Creating Service manager and deployment in goldengate 23ai:
In Part 1(Binaries Installation), We have installed the goldengate 23AI Binaries on Oracle Linux 8 for Oracle 19C database. Now, we will move ahead with Configuring Service manager and Deployment for setting up the Goldengate Replication processes.
Before moving ahead with configuration, let us understand the Service manager and Deployment in brief.
Service Manager:
The Service Manager is the admin service of the Oracle GoldenGate Microservices environment. Which operates as background service, and it manages one or more deployment homes on the local host. Considering it as manager for the services, it tracks all inventory and configuration data. Also, it provides a centralized console to start, stop, and query your services instantly.
Deployment:
A deployment is a configuration to set up for Oracle GoldenGate Microservices to allow creating users, choose if you want to create a secure SSL environment, define the host and port for various microservices offered with Oracle GoldenGate Microservices Architecture. When you add a deployment for the first time, you can set up a new Service Manager and then add more deployments to the existing Service Manager.
Let’s create Service manager and Deployment!!!!
Configuration:
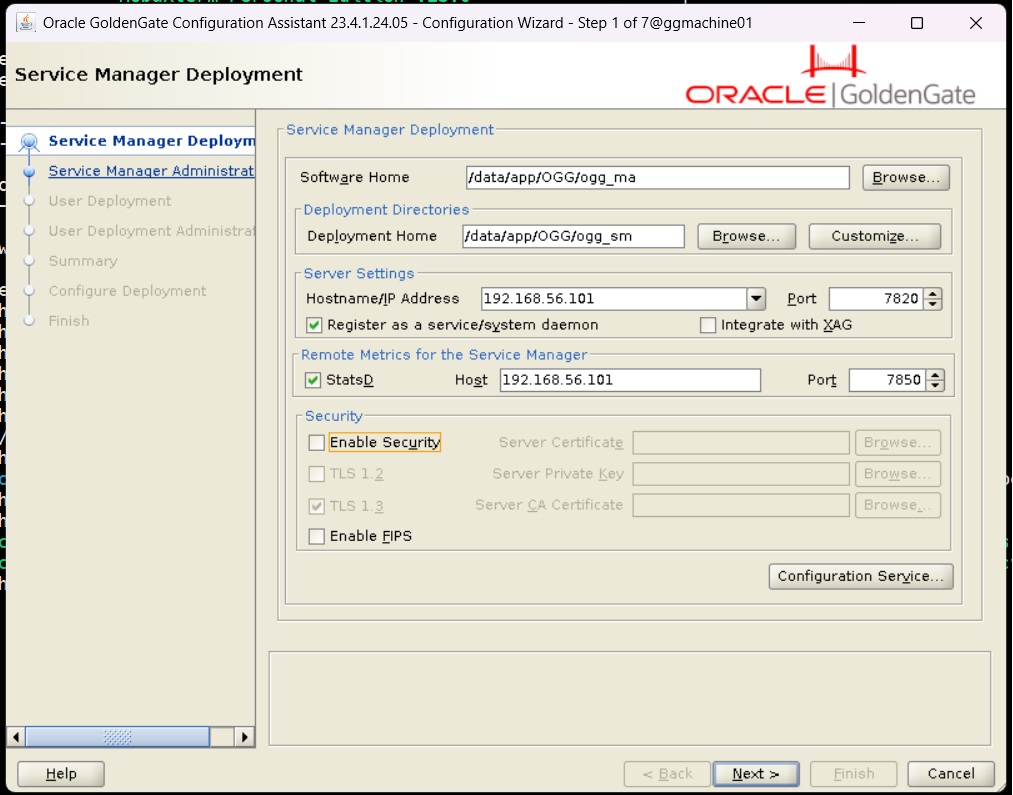
To create a Service Manager, we will trigger the oggca.sh script located @ path /data/app/OGG/ogg_ma/bin.

On the below page, we need to provide details goldengate home, service manager home, ip address, any port number or we can use the default. Also, we can enable security (Optional). Then click on Next.
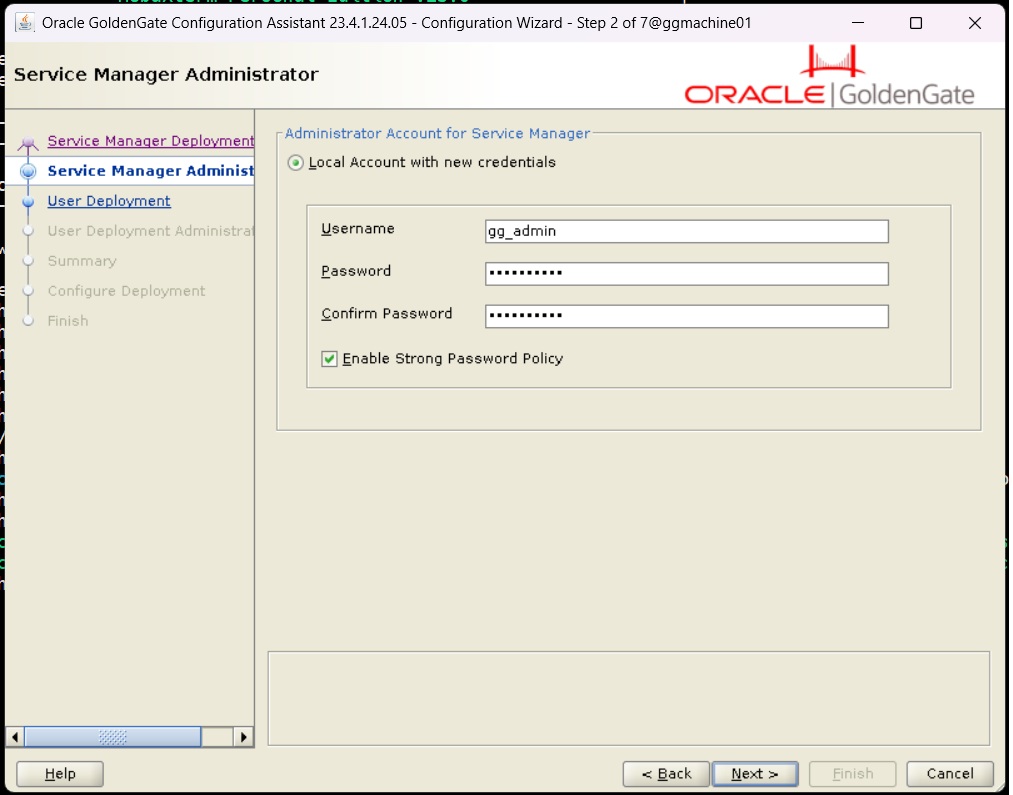
Here, need to provide username and password and click Next.
Note* – This credential will be used to logon to service manager.
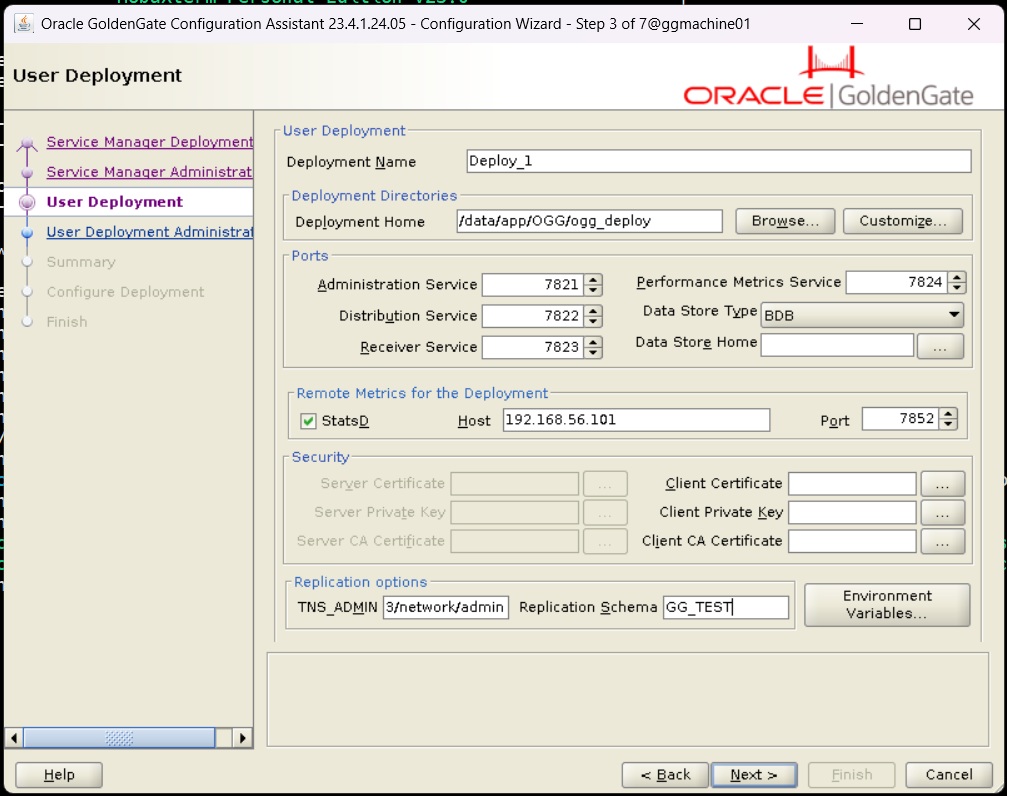
Now, we will configure the Deployment and Deployment home.
Note* – Under single service manager, we can have one or more deployment.
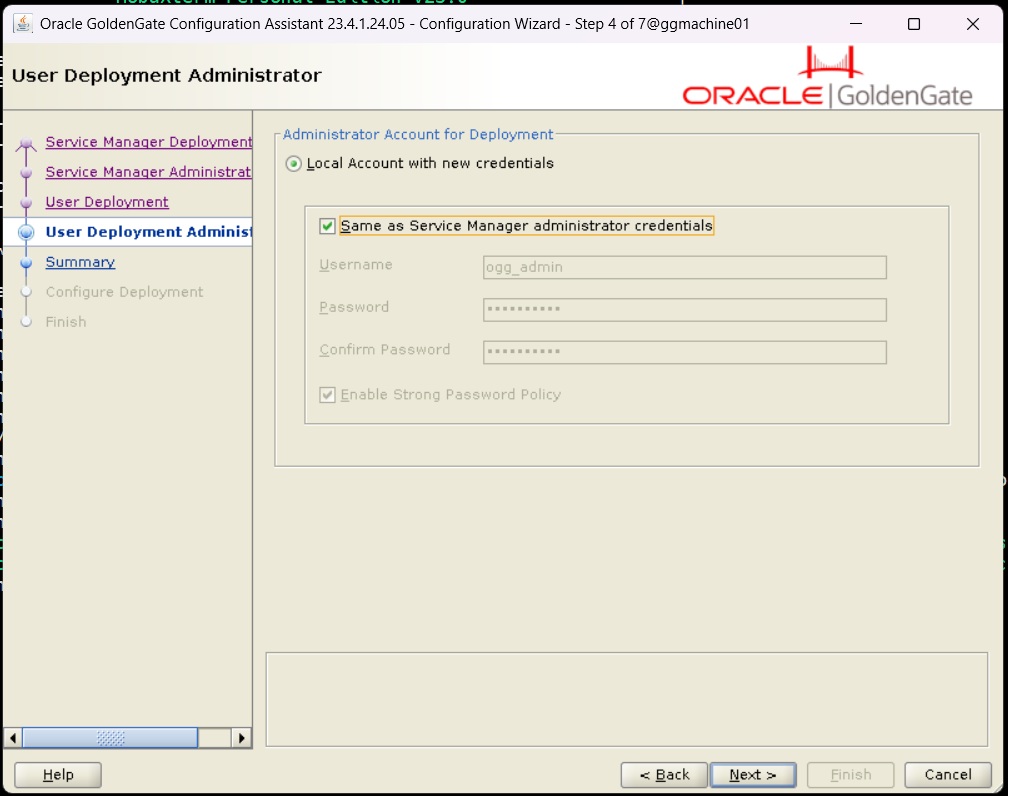
In below step we need to provide credentials for the deployment. Here, we have option to use same credential provided for service manager. Then click on Next.
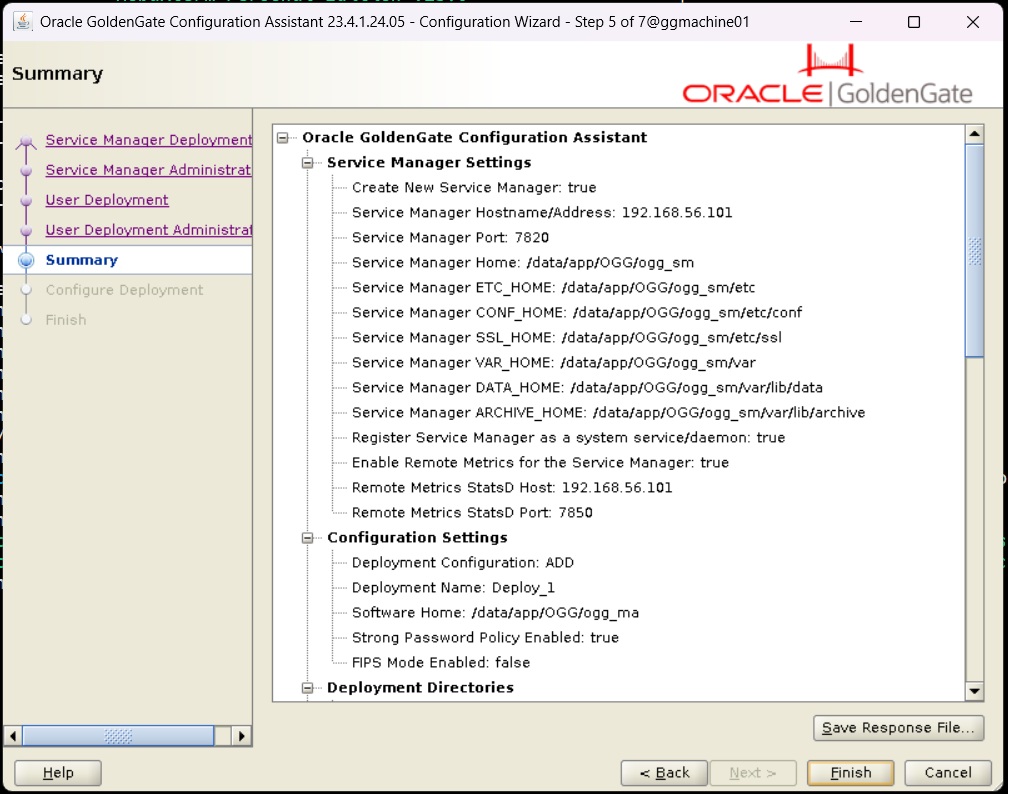
Now, we can save response file and check summary as well. After that, click on Finish to start the Service manager and Deployment configuration.
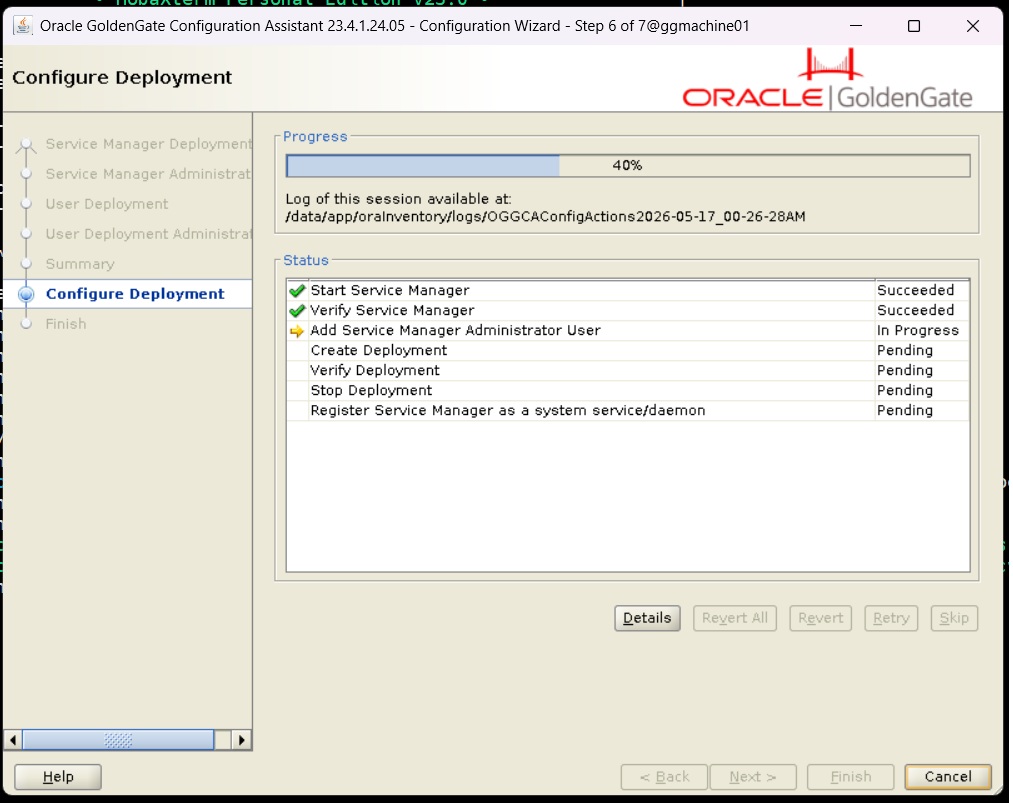
The Configuration is in progress!!!!!!
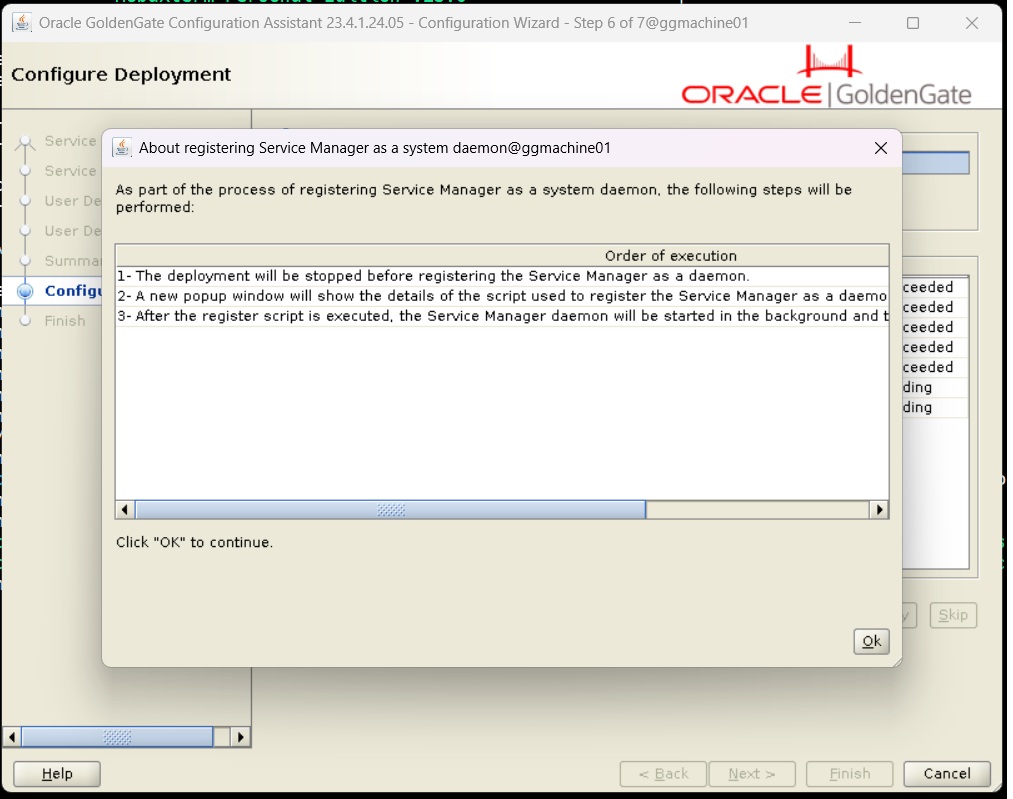
On the ServiceManager configuration page we did select the option to register the Service as System Daemon. Therefore, now it is taking confirmation for that configuration. Click on OK to move ahead
Run below script as root user to register service manager:
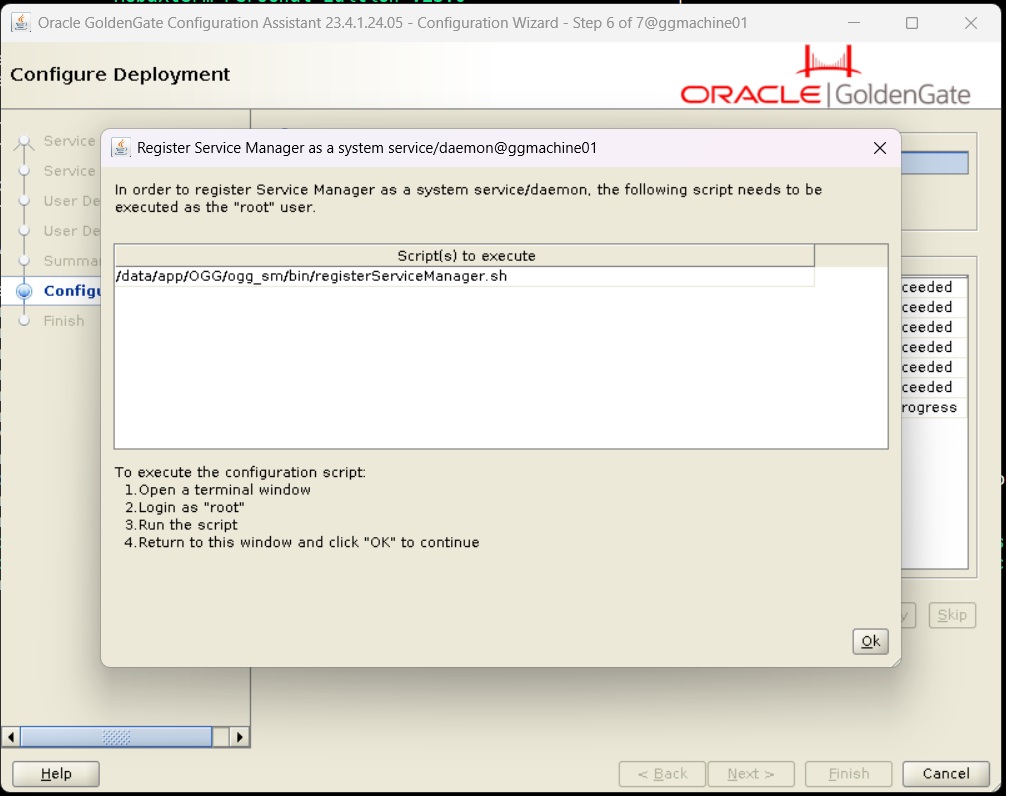
After running the command through root user, the ServiceManager registration will be done.

Now, go back to the installation screen and click on ok button to finish the configuration.
Now, the configuration is complete. Click on Close to complete the setup.
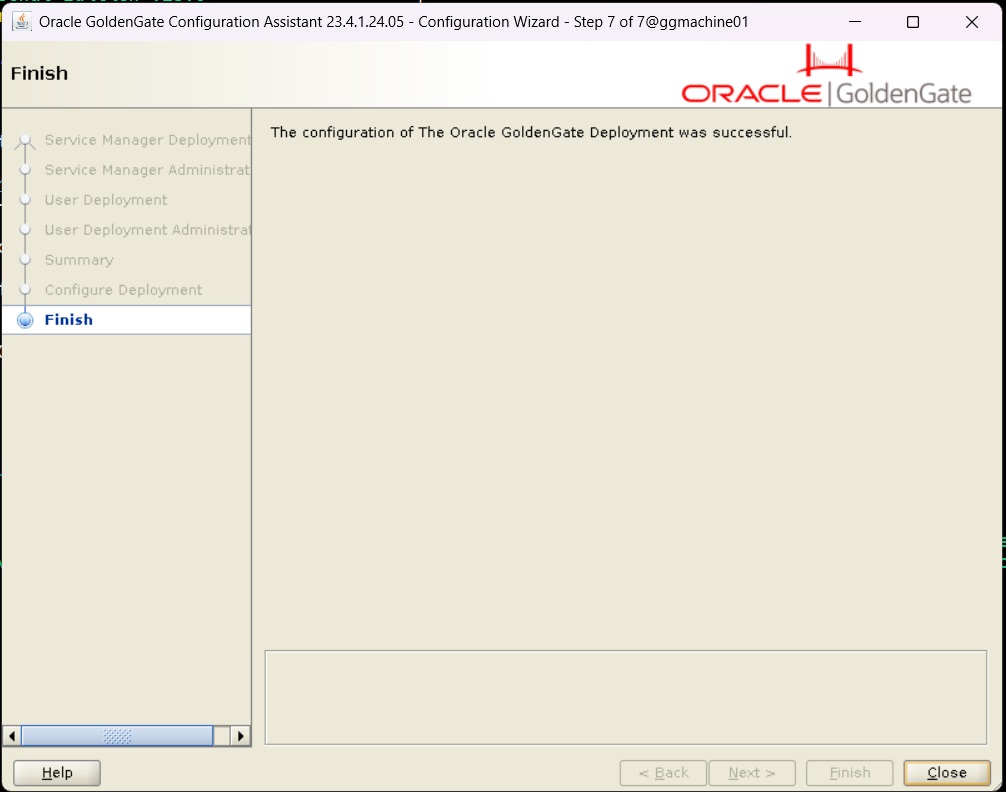
Here, the Service Manager and Deployment configuration is completed. Now, we will check the things are working as expected.
Testing:
We will check ServiceManager is running or not, by executing below command

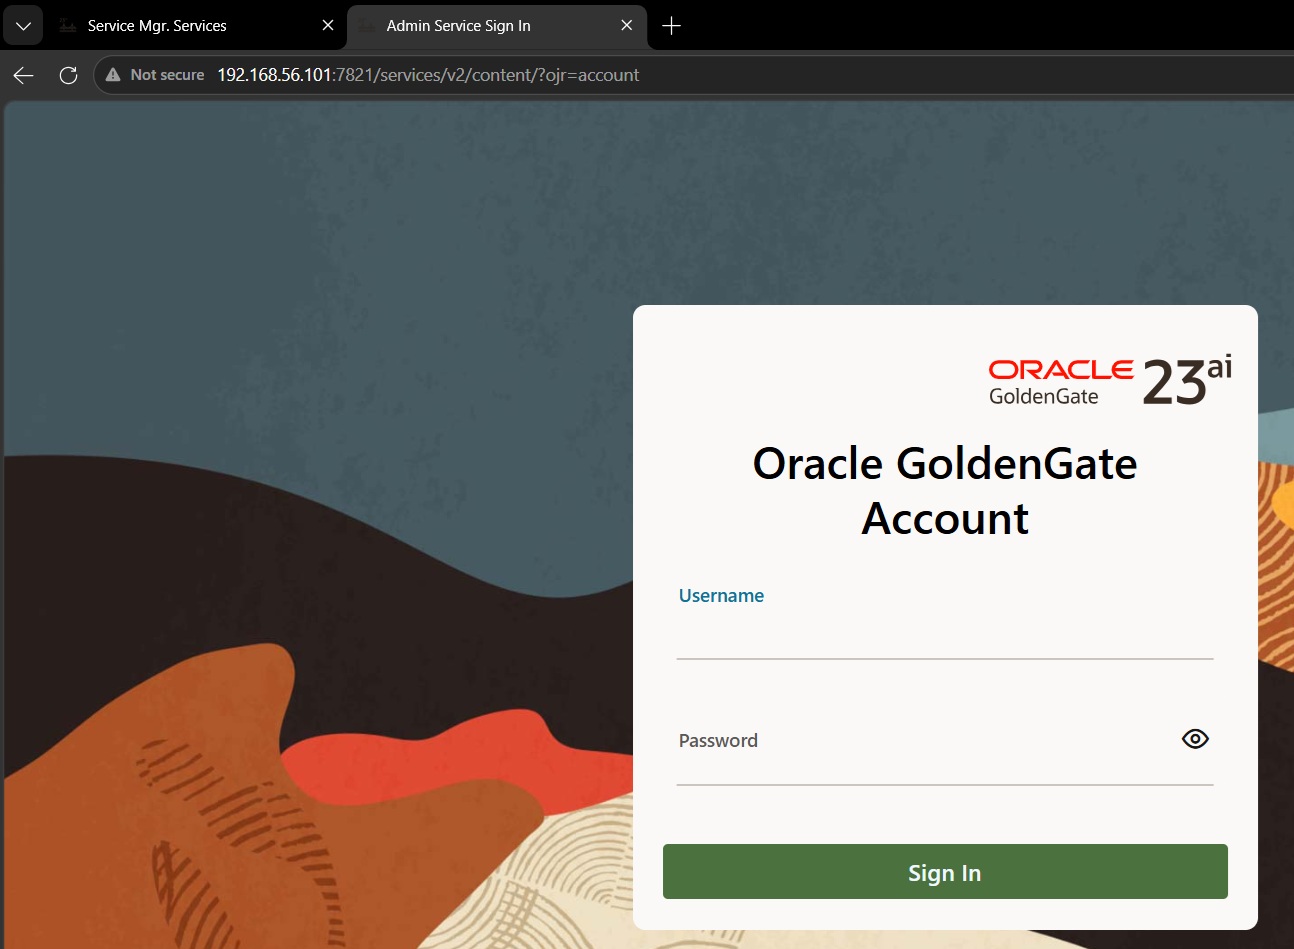
Now, we will login to the Service Manager by going to the ip address and port number entered during the ServiceManager setup.
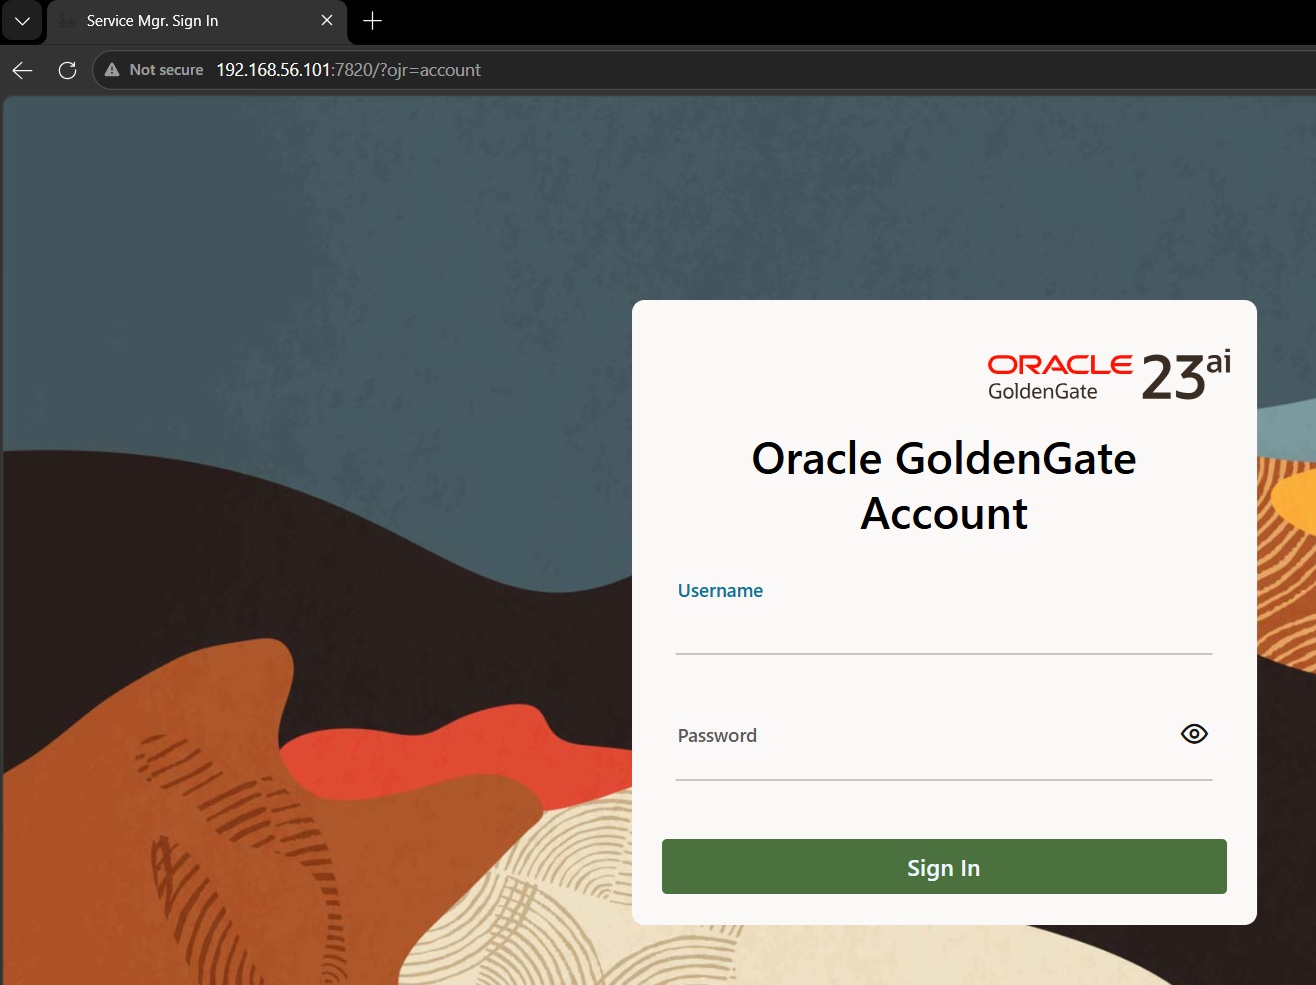
It has asked for the login credentials. After entering the credentials provided during the setup, we will successfully login and get the below ServiceManager dashboard page
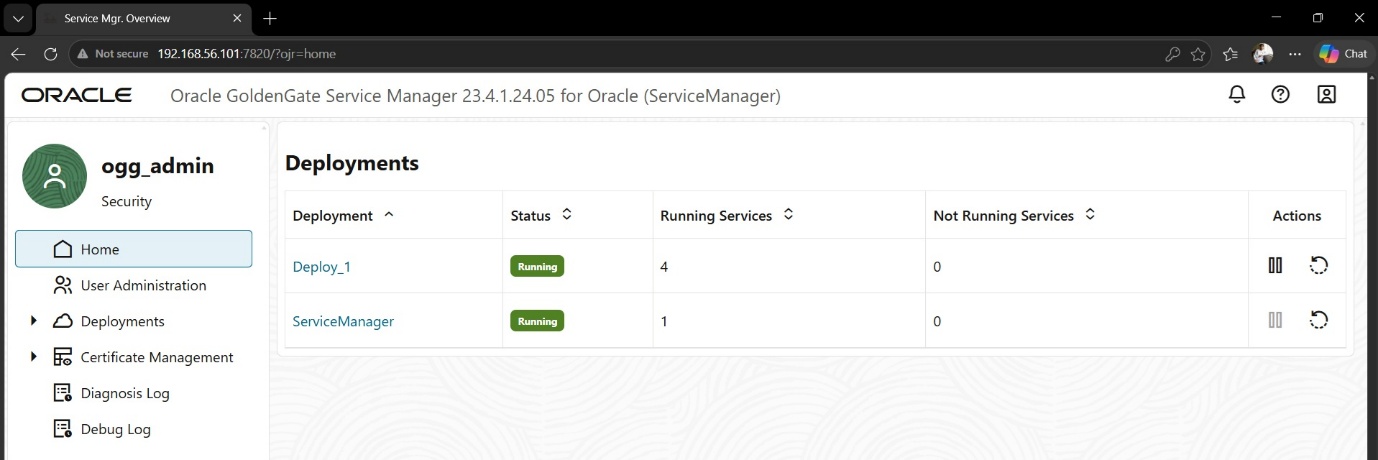
Now, we will check the Deployment configuration, click on the Deploy_1in above screen and it will take us to the Deployment page
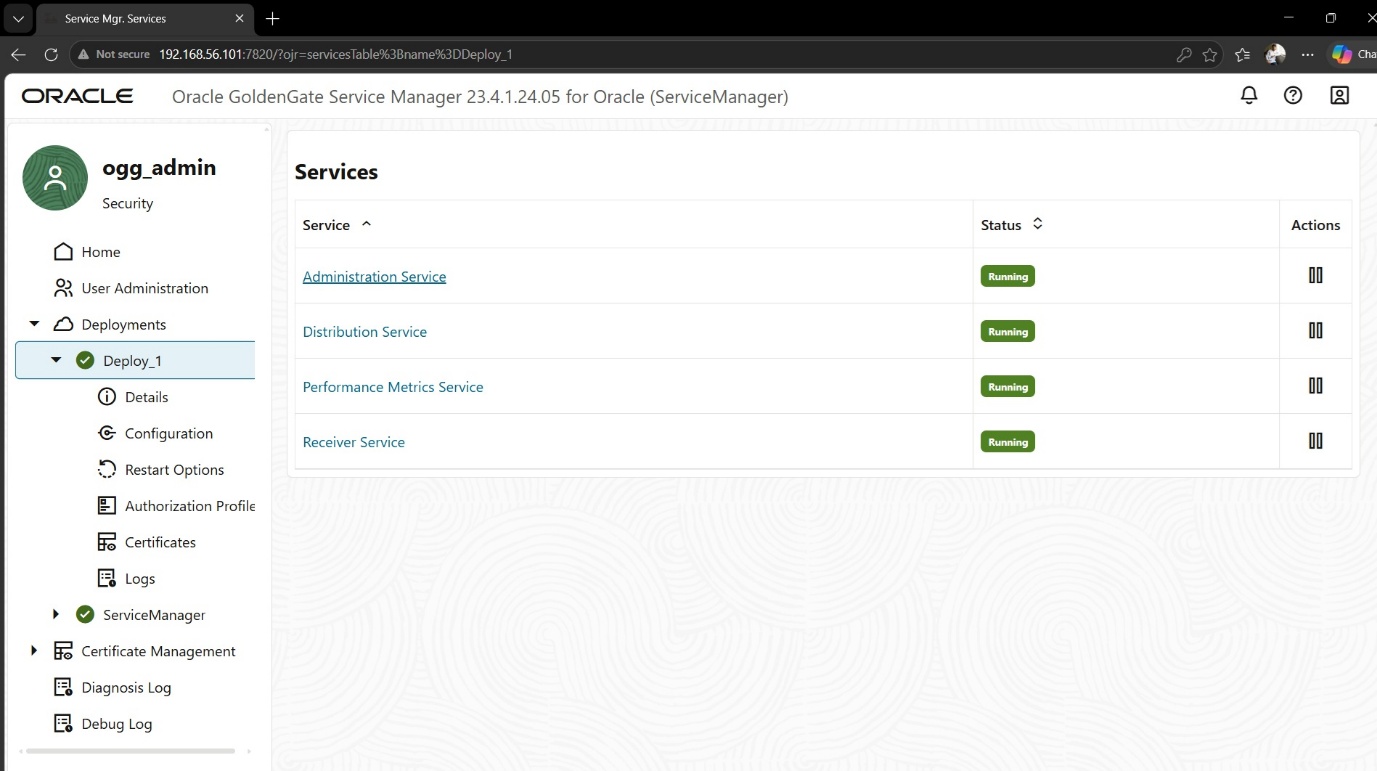
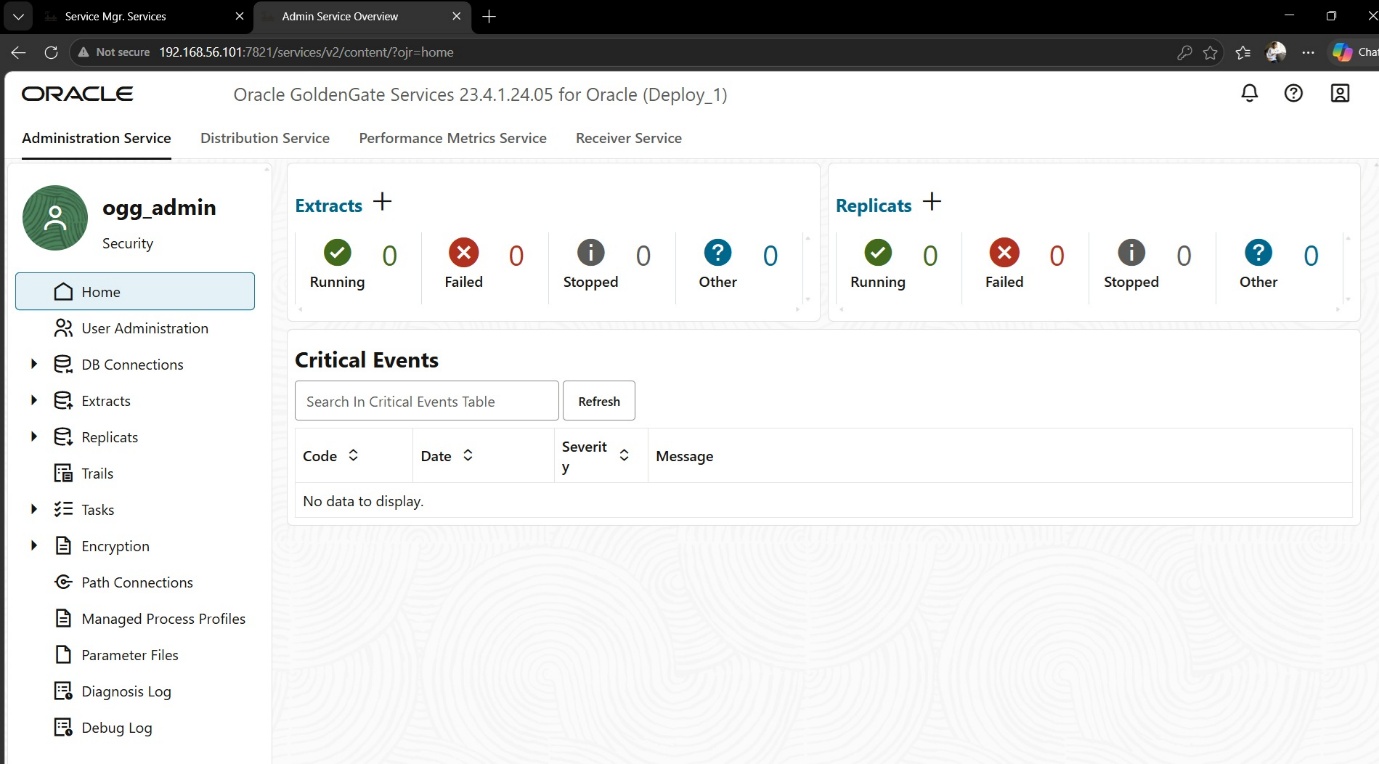
Here we can click on any service to get the details and status of that service. To check the extract and replicat status and details we click on Administration service
To confirm that we are routed to correct service page, we can check the port number in the URL. Also, it is asking for the credentials, during the setup we did check on keeping the same credentials as of ServiceManager. Hence, we will enter the same credentials to continue to Administration service page.
After successful login, we will get the below page
With this testing, we have successfully Installed and configured Goldengate 23AI for Oracle 19C database on Oracle Linux 8 using GUI based installation.