Oracle Goldengate
Oracle GoldenGate 23AI installation and Configuration for Oracle 19C Database on Linux 8(Part 1)
prayank waluskar
Binaries Installation :
Introduction:
Oracle GoldenGate is a software product that allows you to replicate, filter, and transform data from one database to another database.
Enterprise data is typically distributed across the enterprise in heterogeneous databases. To get data between different data sources, you can use Oracle GoldenGate to load, distribute, and filter transactions within your enterprise in real-time and enable migrations between different databases in near zero-downtime.
Prerequisites:
Before starting, ensure the following:
- Two machines with OS Linux 7 (64-bit) with atleast 2 vCPU each machine.
- Minimum 4 GB RAM (recommended)
- At least 40 GB free disk space
- Oracle Database 19c installed and running on source and target database
- Both source and target database have ARCHIVELOG mode ON.
Environment Details:
| Attributes |
Machine 1 |
Machine 2 |
|
Server Name |
ggmachine01 |
ggmachine02 |
|
OS Version |
Oracle Linux Server 8.8 |
Oracle Linux Server 8.8 |
|
Database Version |
Oracle Database 19c |
Oracle Database 19c |
|
GoldenGate Version |
Oracle GoldenGate 23.4 | Oracle GoldenGate 23.4 |
Software download options:
We can download the Goldengate software from any of the below two links :-
- http://www.oracle.com/technetwork/middleware/goldengate/downloads/index.html
- https://edelivery.oracle.com
Installation:
- Unzip the downloaded software zip file.

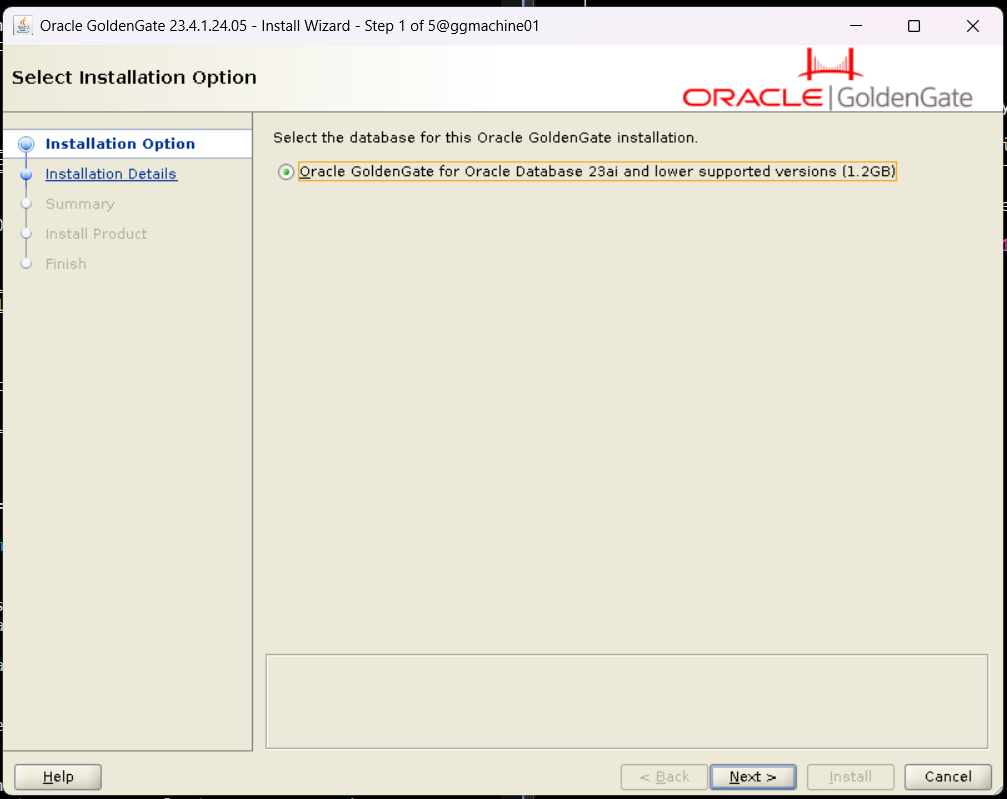
- Run runinstaller

- Click Next
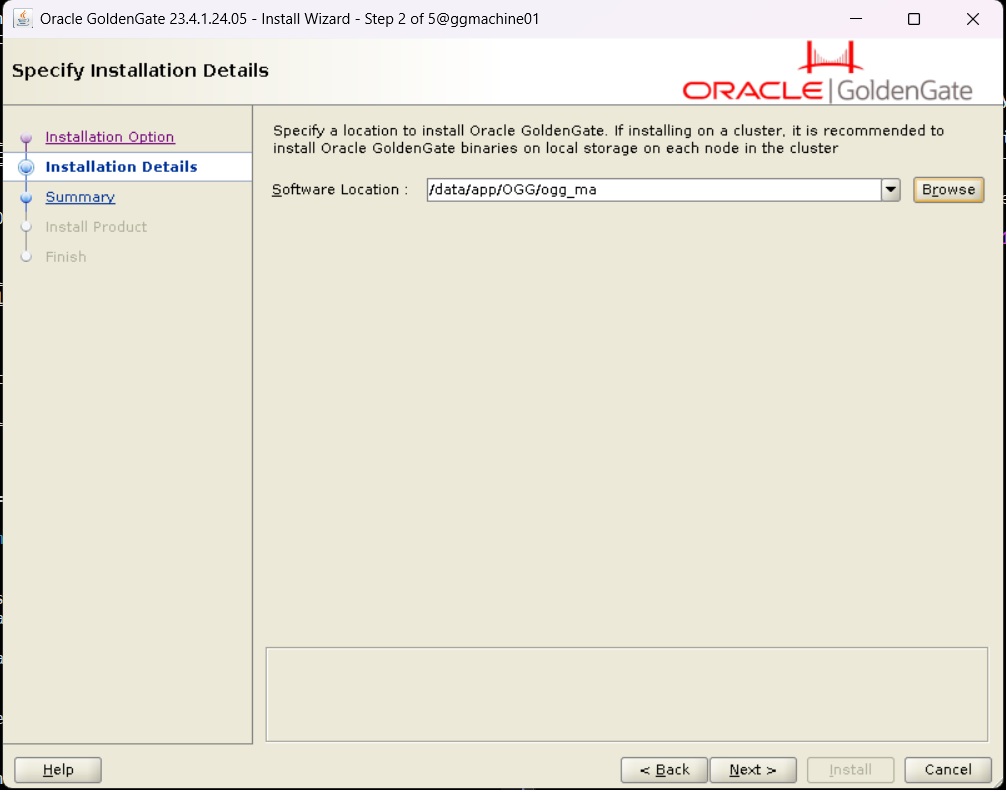
- Provide location for Goldengate binaries installation. Then, click next
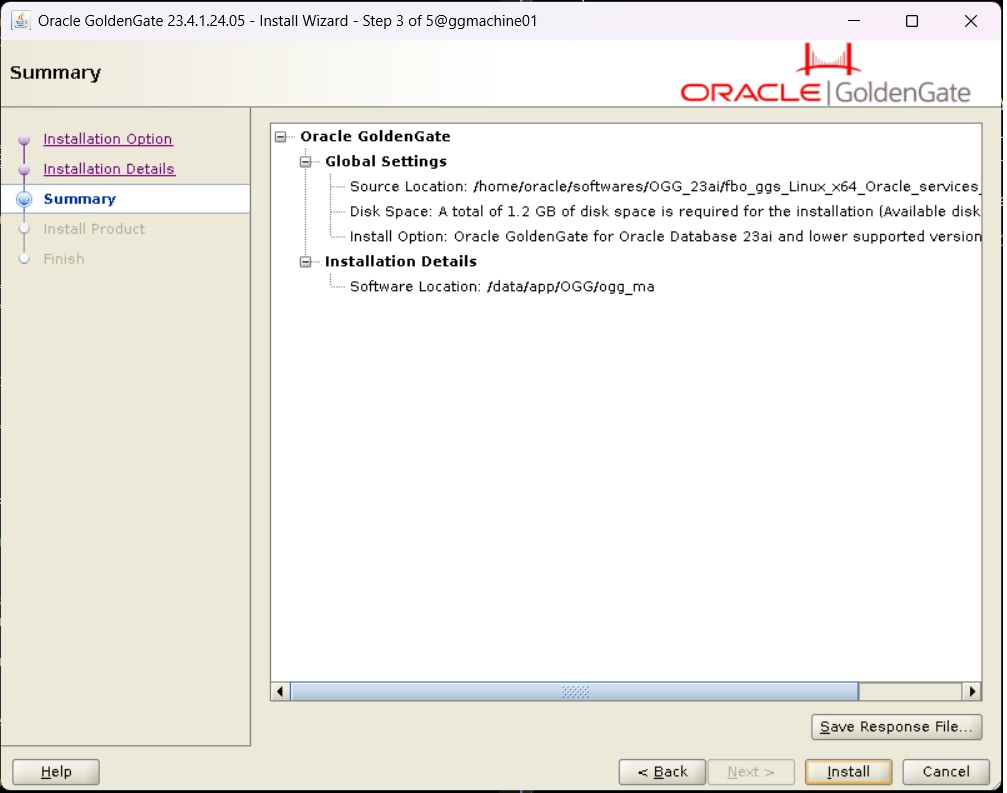
- Once again verify the provided location for Goldengate binaries installation. And, to download the response file click on “Save Response File” (optional). Then, click on “install” to start the product installation.
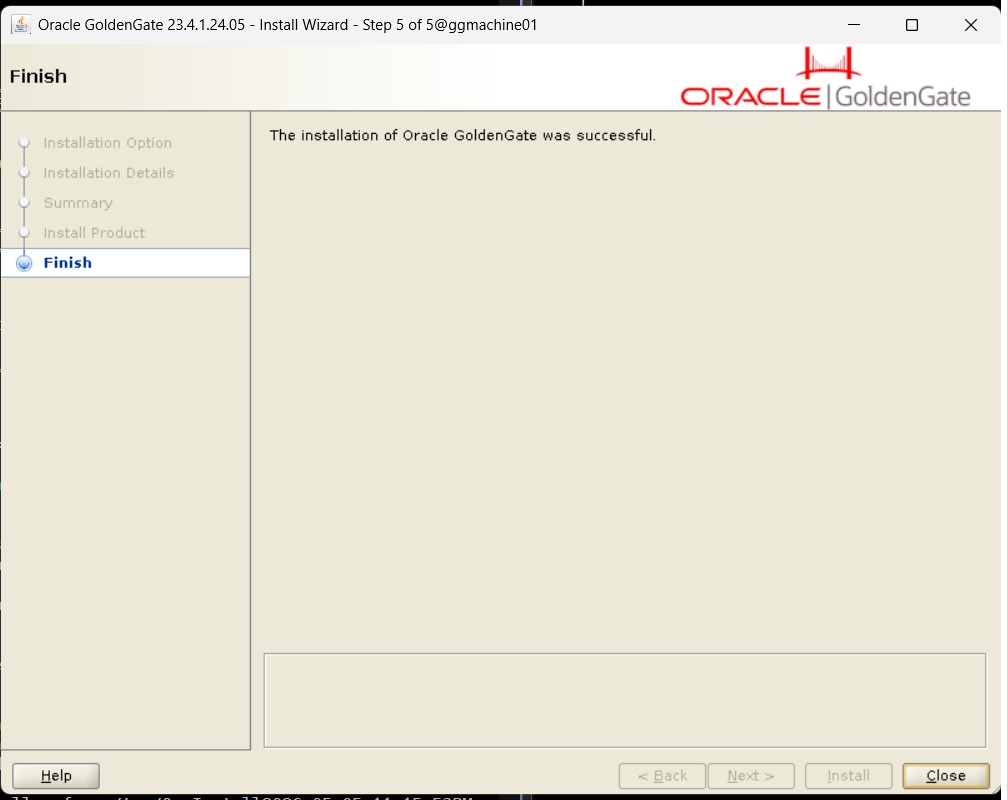
- Setup will start product installation and after installation it will show below finish screen. Click “close” to finish setup.
Once the binary installation completed, below set of files and folders can be seen on the location provided during installation.

In this part we have downloaded the Goldengate software and installed the Goldengate binaries. The Goldengate configuration work will be done in next part. Click on below link to go to next part of Goldengate configuration steps.
Oracle GoldenGate 23AI installation and Configuration for Oracle 19C Database on Linux 8 (Part 2)